Emails
In this post, we’ll walk you through:
Cevento allows you to send automatic emails in the context of the booking process. Cevento can send emails for three booking events: New Booking, Booking Confirmation, Booking Cancellation. You can also send automatic event reminder emails before an event starts.
The prerequisites for an email to be sent are as follows:
- the plugin must be allowed to send emails (see Send Emails in the event settings)
- bookings must be enabled for your event (see Enable Bookings in the event settings)
- for admin emails, at least one valid email address must be stored (see Admin E-Mails in the global settings)
- subject and content must be provided (see E-Mail Templates in the global settings)
If any of these prerequisites are not met, the corresponding email will not be sent.
Types of emails
For each booking event, two emails can be sent:
- one email to the user who made the booking, and
- one email to all addresses entered in the global settings under Admin E-Mails.
For each email, you can fill in E-Mail Templates.
If no email address is entered in the global settings under Admin E-Mails, no emails will be sent to admins.
Event reminder emails
Event reminders are sent to users with confirmed or paid bookings before the event starts. You can enable them globally under Cevento → Settings → E-Mails → Reminder by activating Send Event Reminders.
Use Reminder Days Before Event to define how many days before the event the reminder should be sent. For example, if the value is set to 3, Cevento sends the reminder three days before the event starts.
The reminder email has its own subject and content fields. Like other user-facing booking emails, it can use Cevento Data such as {event:title}, {event:date}, {form:summary}, and the cancellation placeholder {cancel} where available.
Structure of emails
You can customize the following parts of a Cevento email: the optional logo, the text content, the subject, and the footer.
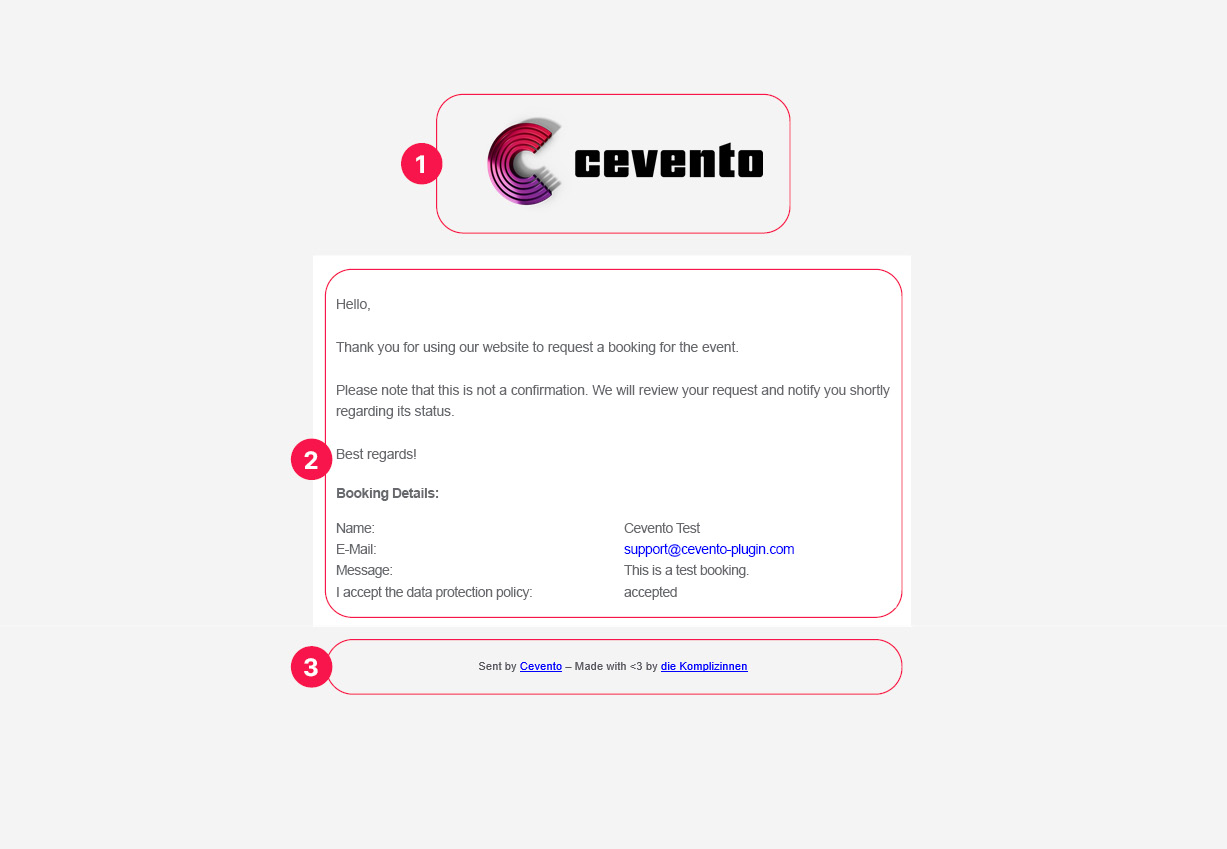
[1] Logo, [2] Content, [3] Footer
Editing logo and footer
You can set the optional logo and the content for the footer in the global settings, under the E-Mails tab in the General submenu.
Editing E-Mail Templates
The subject and content of your email are defined in the E-Mail Templates. There are two places where you can manage E-Mail Templates:
- in the global settings, where you can define templates that apply to all events with bookings enabled
- in the event editor, under the E-Mail Templates tab, where you can create custom email texts for that specific event
As soon as a template is filled in at event level, the global templates no longer apply for that event.
Cevento Data
In all subjects and contents of E-Mail Templates, you can use keywords to insert Cevento Data. Cevento Data are values pulled directly from the event or booking — for example, the event title or the email address of the user who made the booking. You may know this concept from other systems, often referred to as “dynamic content.”
In the text editors, you’ll find a button called Cevento Data that lets you insert these keywords. As soon as you save the event after selecting the booking form in the settings, you see all form fields in the Cevento Data select.
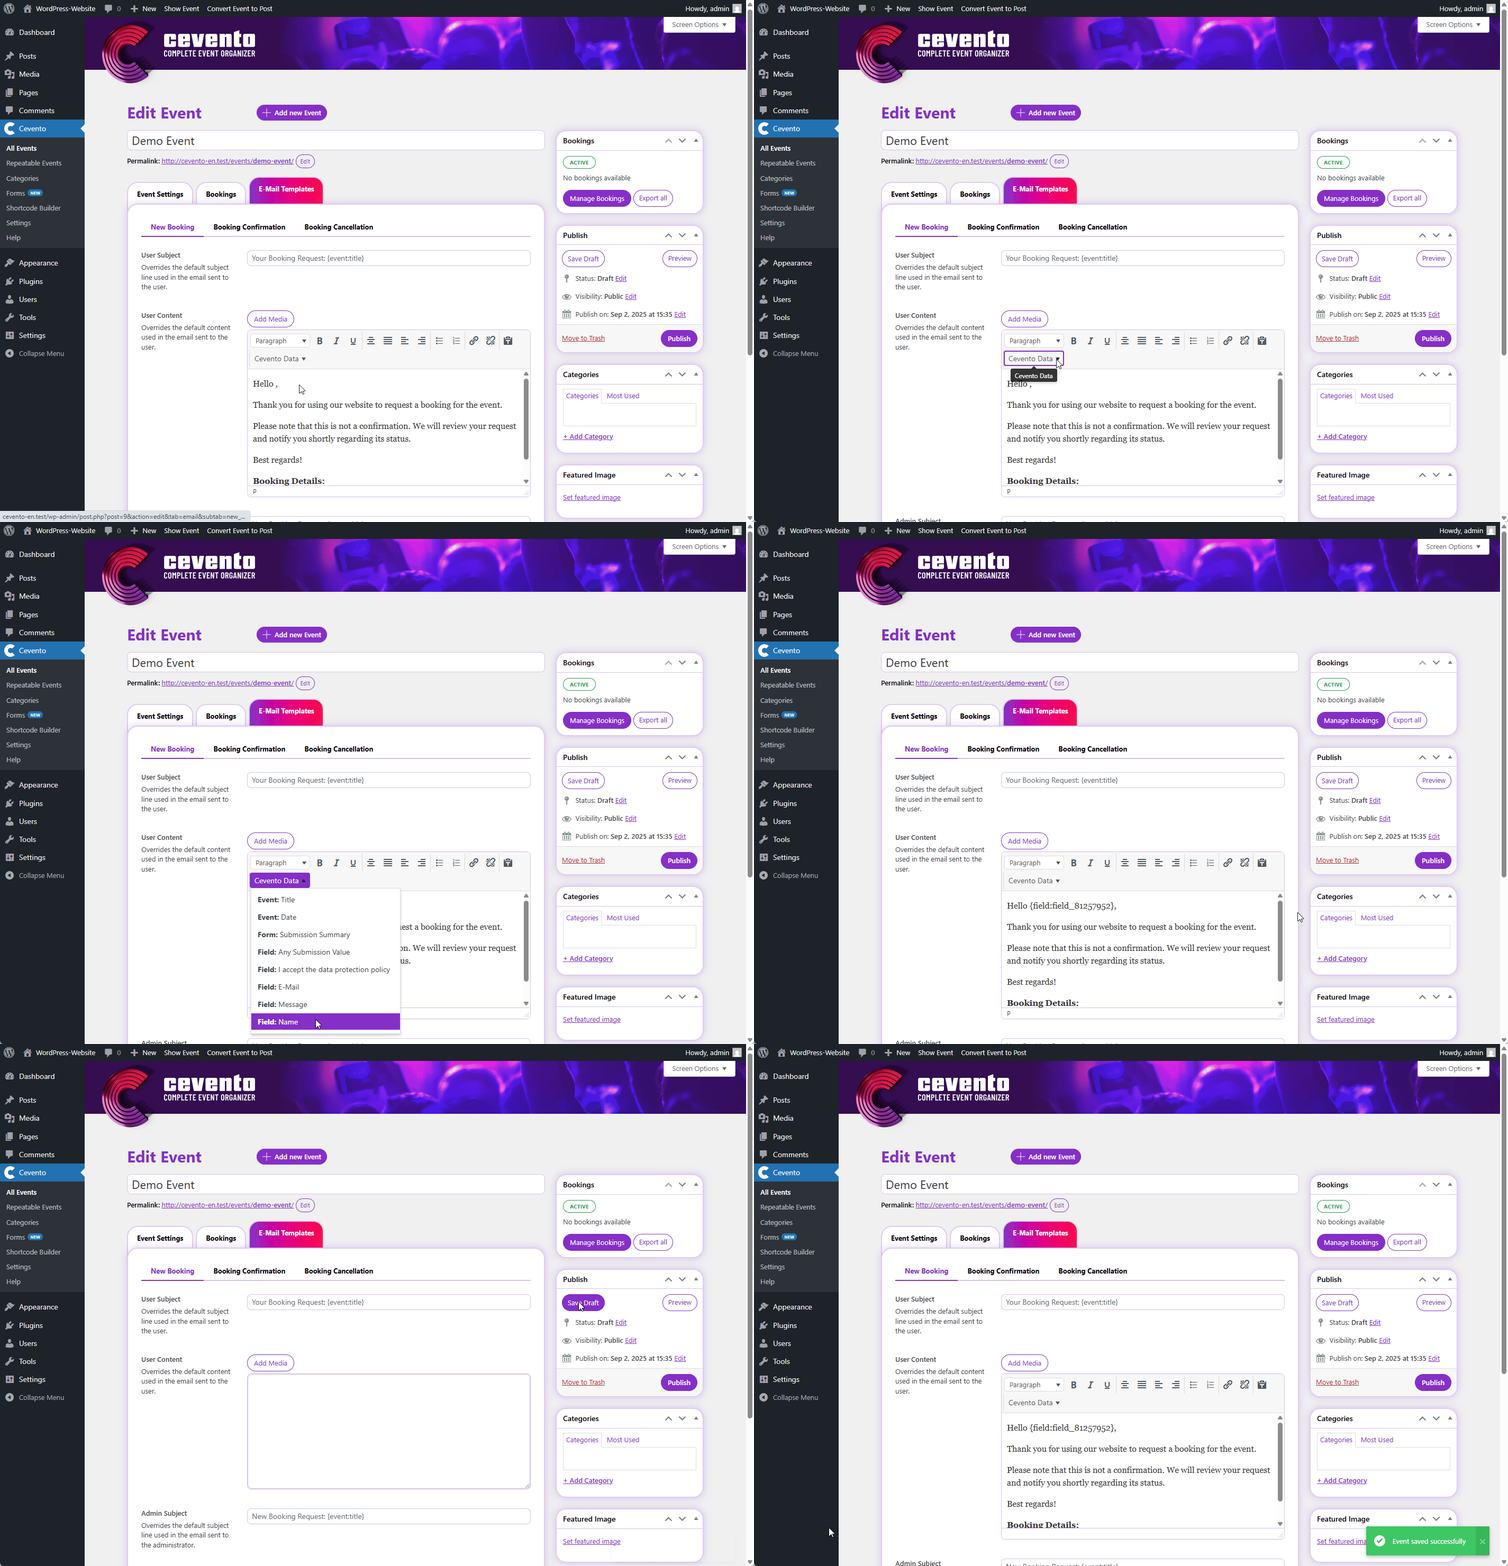
List of keywords
Each keyword consists of curly brackets, the context (event, form, or booking field value), followed by a colon and the content name.
Cevento Data from the event
- Event title: {event:title}
- Event date: {event:date}
Cevento Data from the individual booking
- Summary of all booking values: {form:summary}
- Individual booking field values: {field:field_key}
To correctly insert a single booking field value, replace the placeholder “field_key” in the keyword above with the actual field key from the booking form.