Create a Recurring Event
In this post, we’ll walk you through:
A major advantage of Cevento is the ability to create events based on a defined Schedule. A Recurring Event automatically generates individual events according to the Schedule you set and manages them globally. An event managed by a Recurring Event is called a Repeated Event.
Example use case
An example would be a dance class that takes place every Tuesday. The Recurring Event “Dance Class” manages the individual “Dance Class Sessions.” The number of “Dance Class Sessions” created depends on the Schedule you define. If your Schedule covers 4 weeks, then 4 “Dance Class Sessions” will automatically be created and managed by the “Dance Class” event.
Preparation
Before creating a new Recurring Event, you should already be familiar with creating a single event.
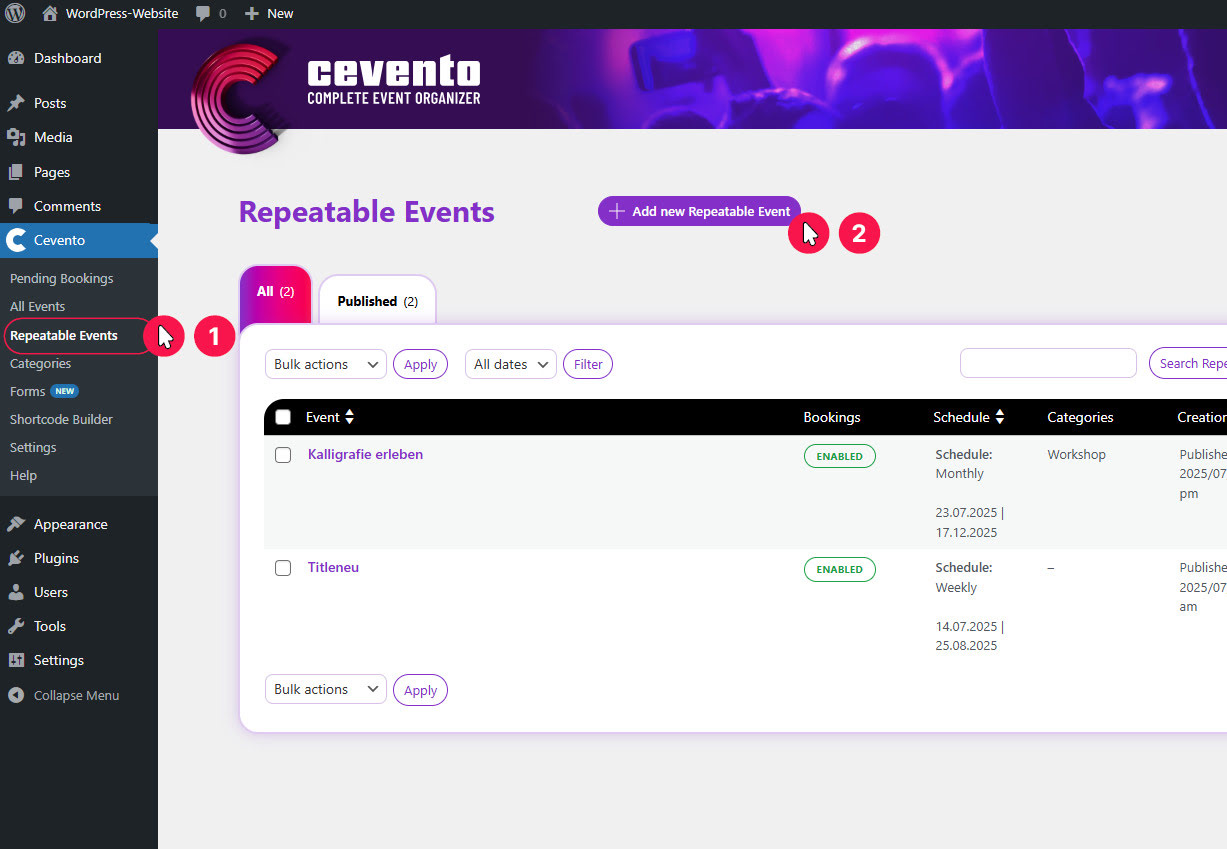
Add a new Recurring Event
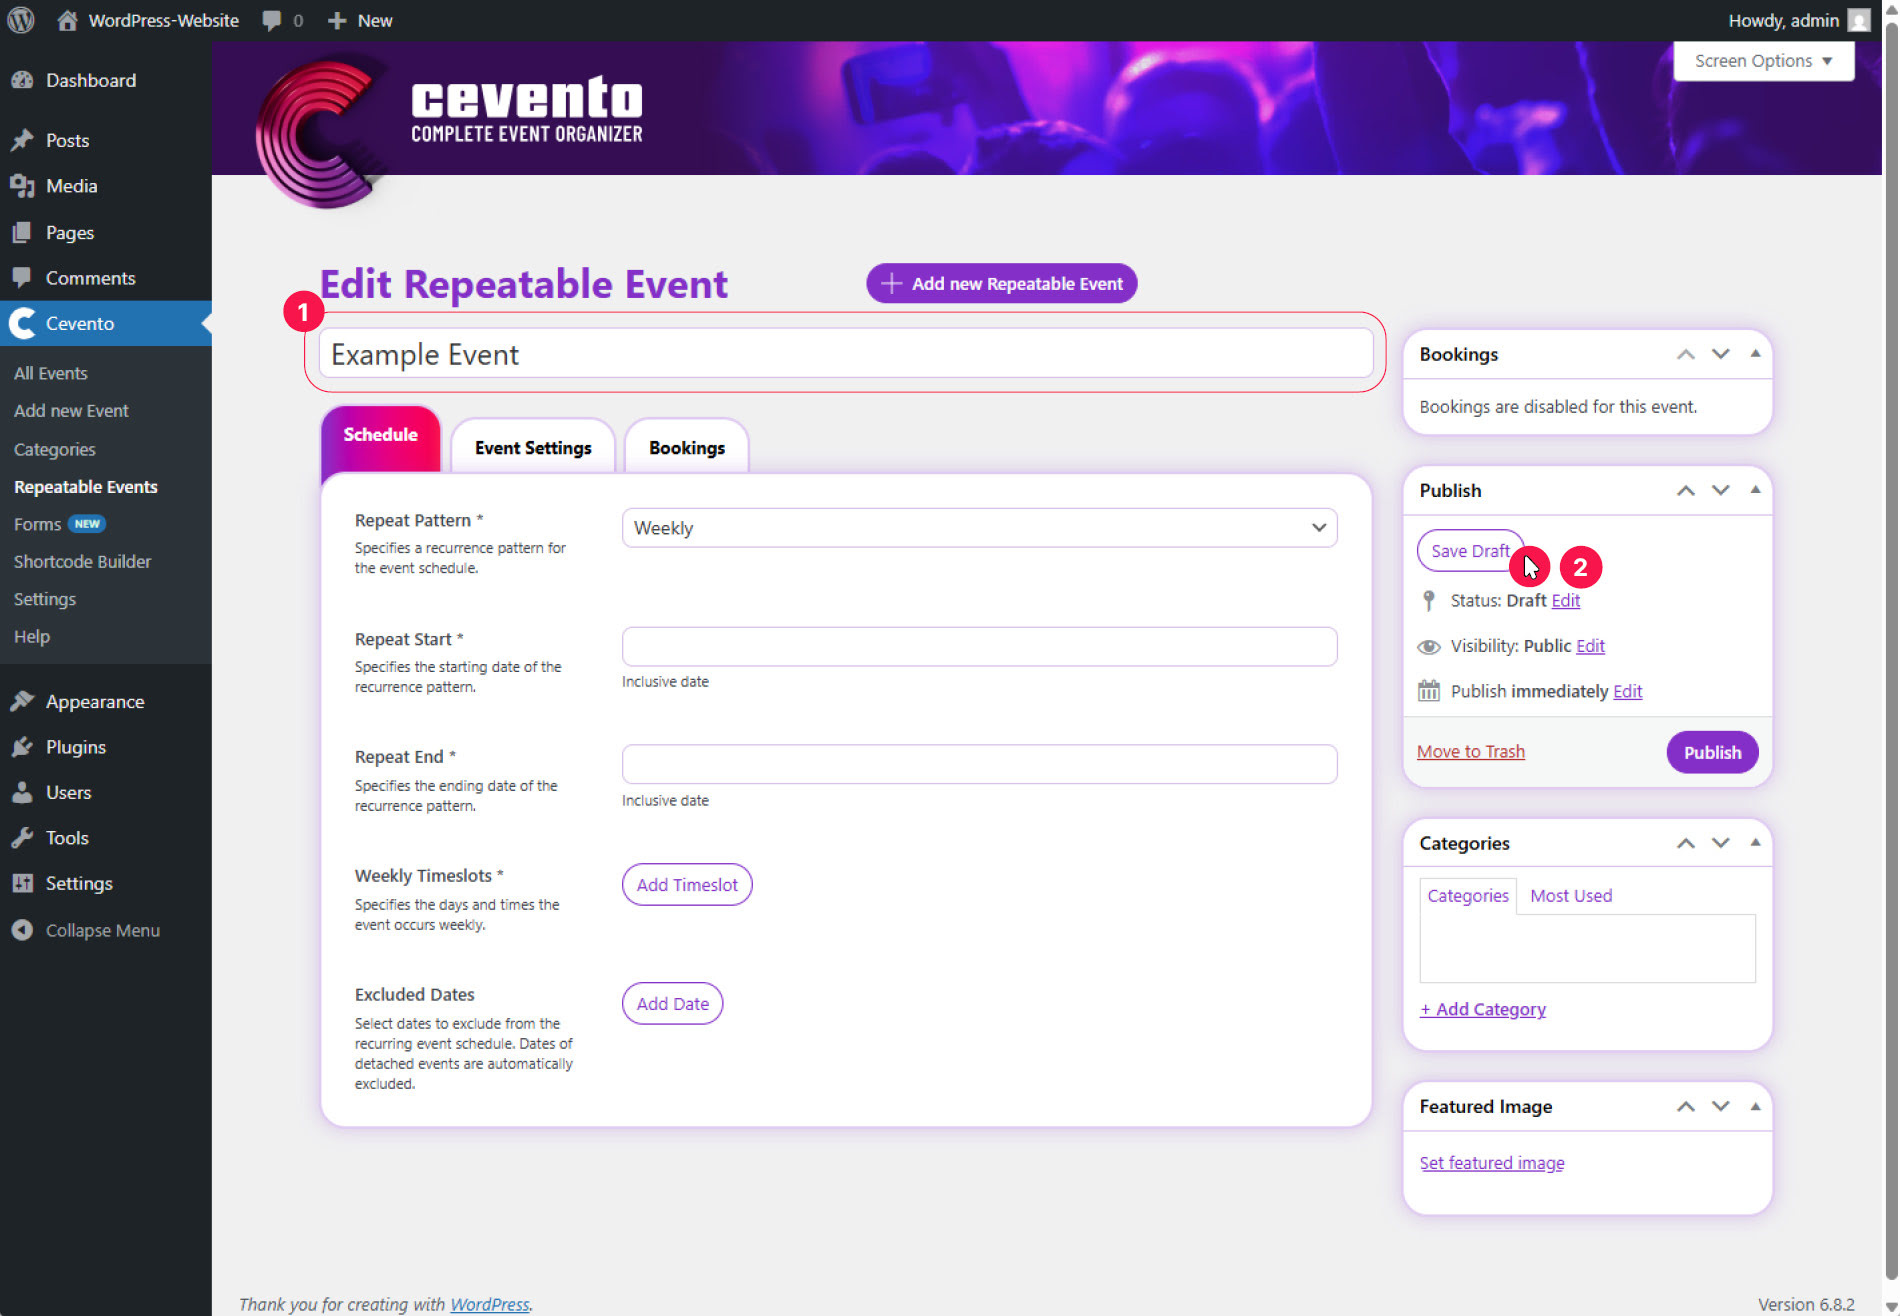
To create a new Recurring Event, navigate in the WordPress dashboard to Cevento → Recurring Events. There, click the button Add new Recurring Event. After clicking the button, you’ll land in the event editor. On the left, you’ll see an input field for the title and below it tabs where you can configure the event settings (metadata). On the right, you’ll see the metaboxes from Cevento and WordPress page properties.
Enter a title
Enter the desired title of the event in the input field Enter title here and click Save Draft in the Publish metabox. Each automatically generated Repeated Event will carry this title.
Set basic event settings
The last three tabs (General, Bookings, E-Mails) work exactly the same as in the settings of a single event. Therefore, only the first tab Schedule is explained here, while for the others you can refer to the document on creating single events.
Schedule
In this tab, you can create the Schedule. Based on it, individual Repeated Events will be automatically generated by Cevento.
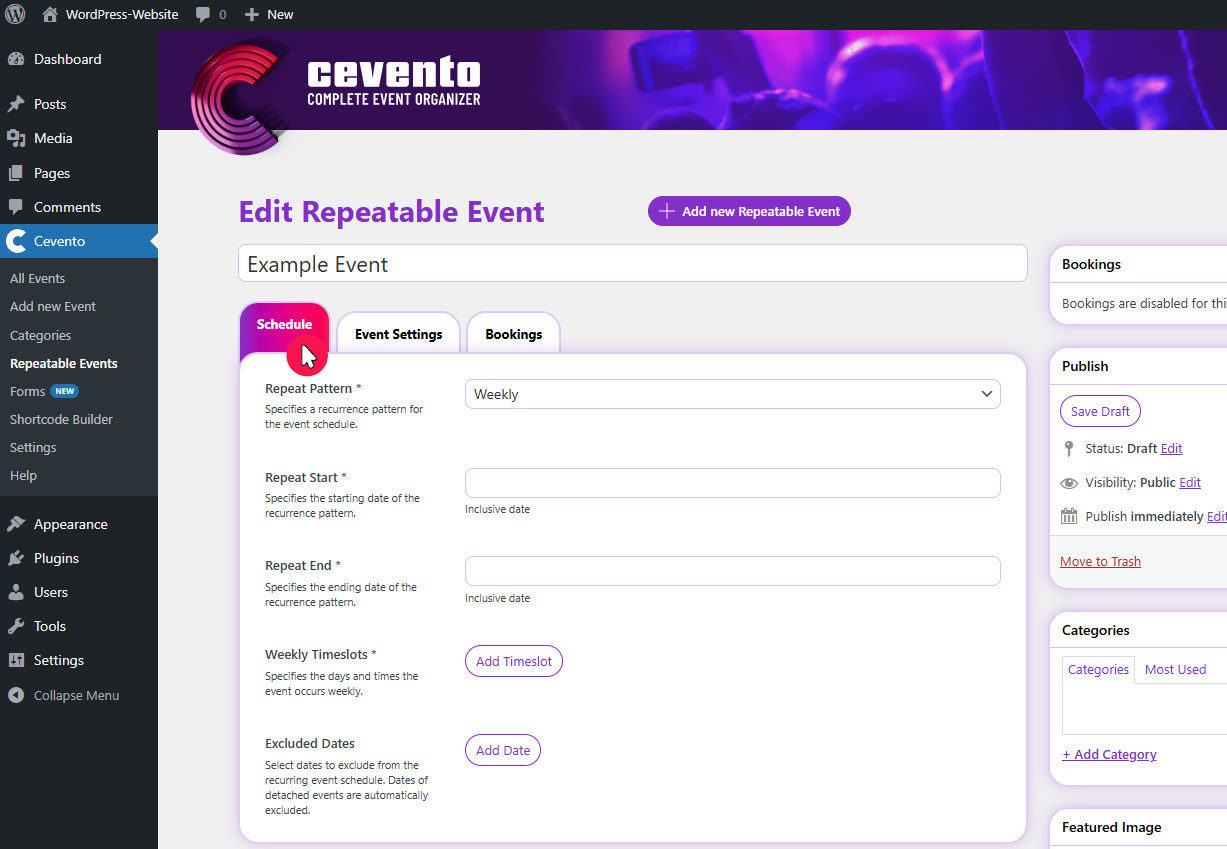
Interval
The option selected in this dropdown defines a recurrence for the Schedule. Your event can repeat daily, weekly, or monthly. Default: Daily.
Start Date
The date entered here defines the start of your Schedule. From this date onward, events will be generated according to the Schedule.
End Date
The date entered here defines the end of your Schedule. Events will be generated up to and including this date according to the Schedule.
Timeslots
The field for timeslots changes depending on the option you selected in Interval. The following three variations are possible.
Daily Timeslots
If your recurrence is Daily, you can define one or more recurring timeslots for the Schedule. Click the button Add Timeslot and fill in the following fields.
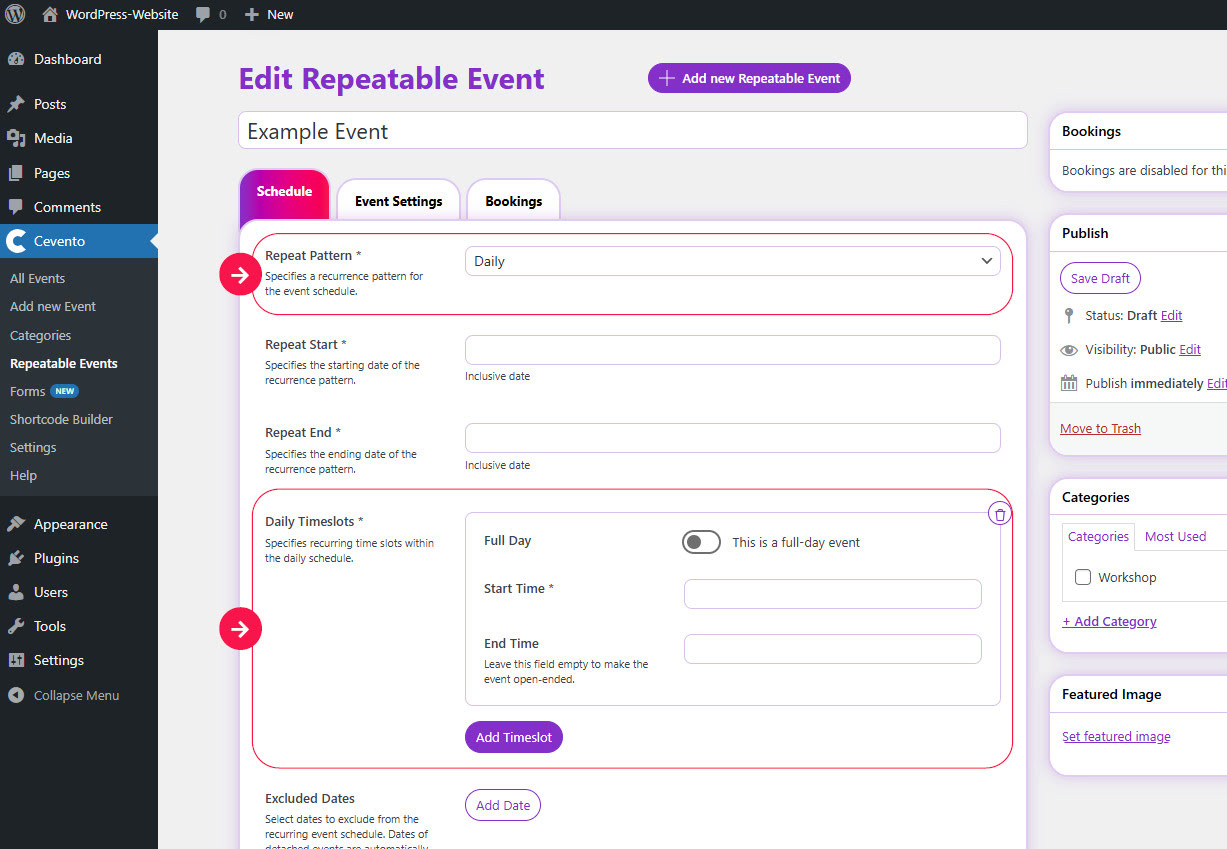
Full Day
Enable this switch if your event lasts all day. The two following time input fields will then be hidden.
Start Time
The time entered here defines the start of the daily timeslot.
End Time
The time entered here defines the end of the daily timeslot. You can leave it empty if your event should have no defined end (open-end event).
Weekly Timeslots
If your recurrence is Weekly, you can define one or more weekly recurring timeslots for the Schedule. Click the button Add Timeslot and fill in the following fields.
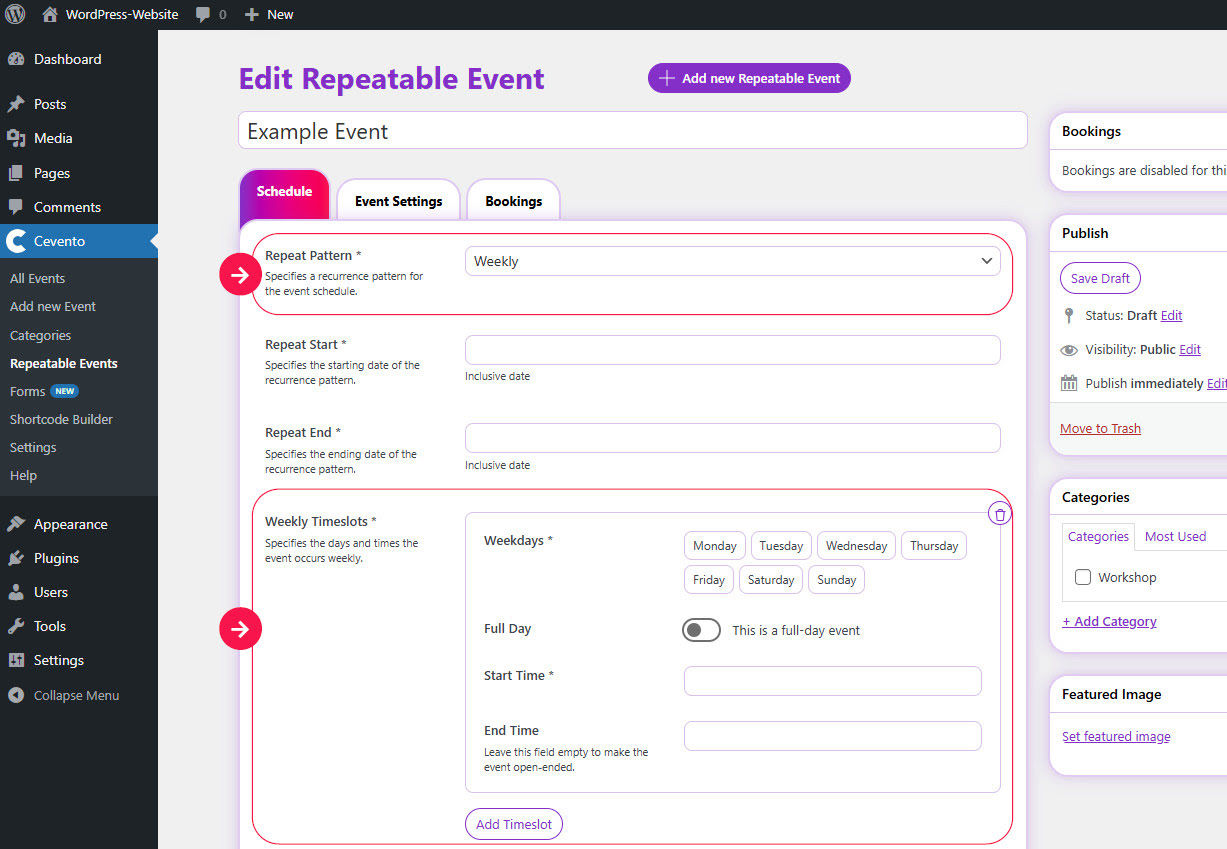
Weekdays
Select one or more Weekdays for the timeslot during which your event will take place.
Full Day
Enable this switch if your event should last all day on all selected weekdays. The two following time input fields will then be hidden.
Start Time
The time entered here defines the start of the weekly timeslot.
End Time
The time entered here defines the end of the weekly timeslot. You can leave it empty if your event should have no defined end (open-end event).
Monthly Timeslots
If your recurrence is Monthly, you can define one or more monthly recurring timeslots based on week and weekday. Click the button Add Timeslot and fill in the following fields.
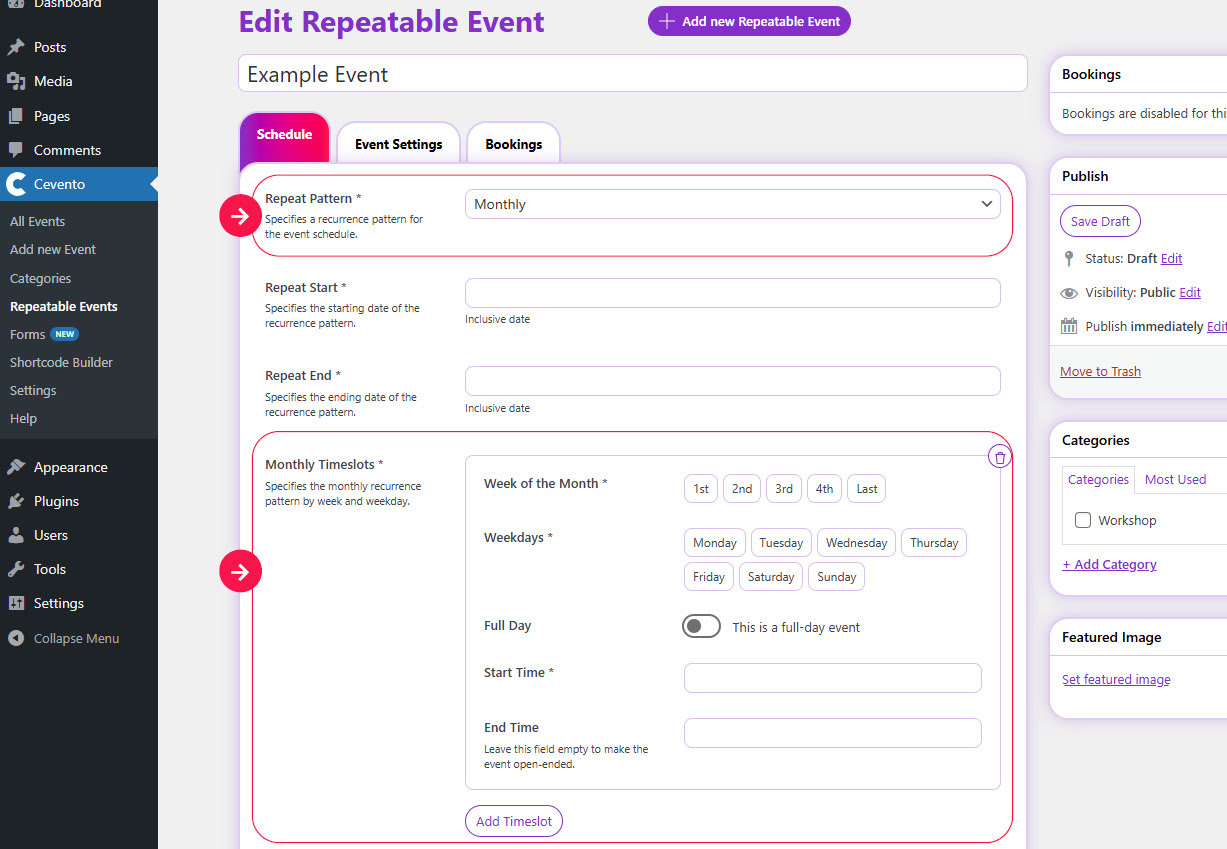
Week of the Month
Select one or more weeks of the month for which the timeslot should apply.
Weekdays
Select one or more weekdays for the timeslot during which your event will take place in the selected weeks of each month.
Full Day
Enable this switch if your event should last all day on all selected weeks and weekdays. The two following time input fields will then be hidden.
Start Time
The time entered here defines the start of the monthly timeslot.
End Time
The time entered here defines the end of the monthly timeslot. You can leave it empty if your event should have no defined end (open-end event).
Excluded Dates
Here you can define dates that should be excluded from the Schedule. Click the button Add Date and select the date to exclude.
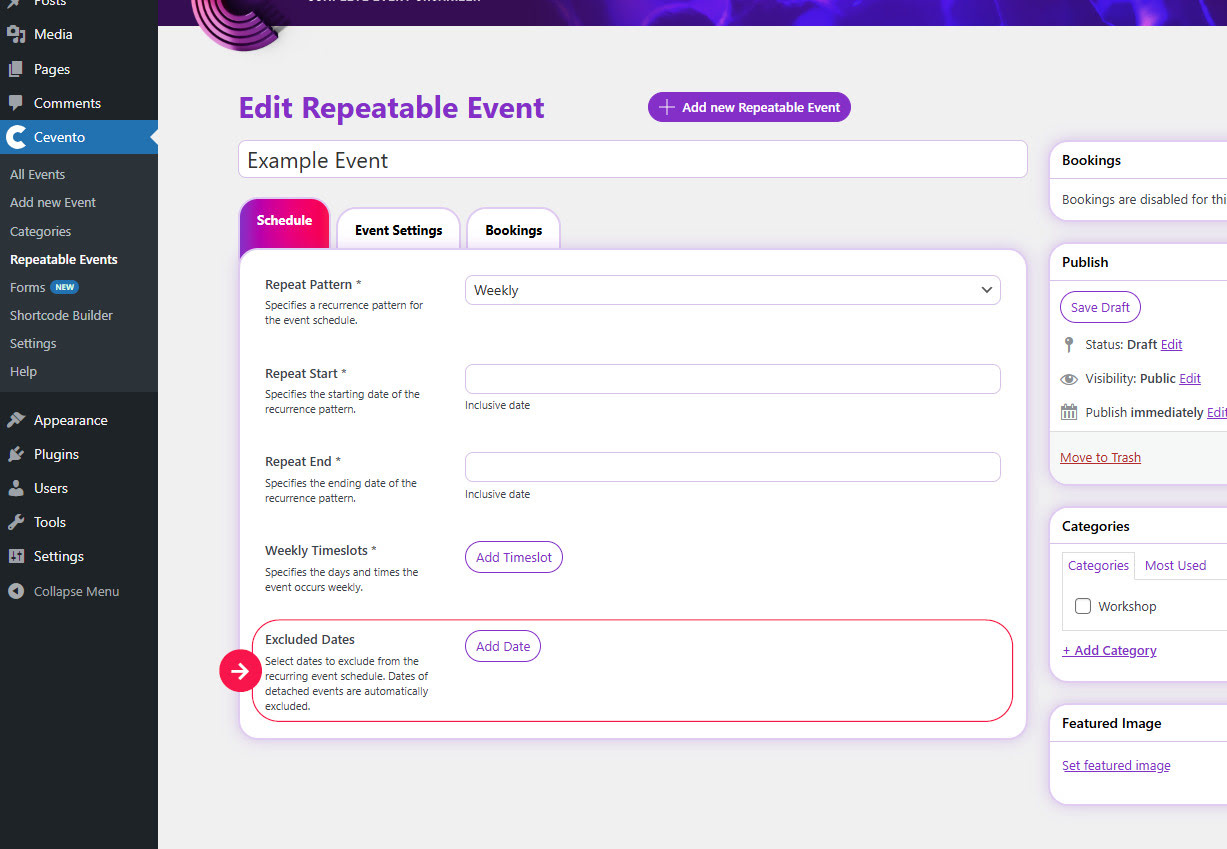
An example could be a public holiday or a day when you are not available to hold the event. Dates of detached single events (repeated events) are automatically excluded.
Add optional information and save the event
How to add optional information (categories, featured image, etc.), and how to save and publish the event, can be found in the document about single events.
Next steps
- Learn what to consider when editing events
- Read about validation errors
- Learn how to manage bookings for your event