Installation
In this post, we’ll walk you through:
Preparation
To install Cevento on your WordPress website, you need to complete the following steps in advance:
- Purchase the plugin
- Download the plugin to your computer
- Log in to the WordPress dashboard
Install Cevento
- In the WordPress dashboard, go to Plugins.
- Then click the button Add New Plugin.
- Click the button Upload Plugin.
- Select the file cevento.zip from your system.
- Once selected, you will see the filename in the field and can click the button Install Now to the right.
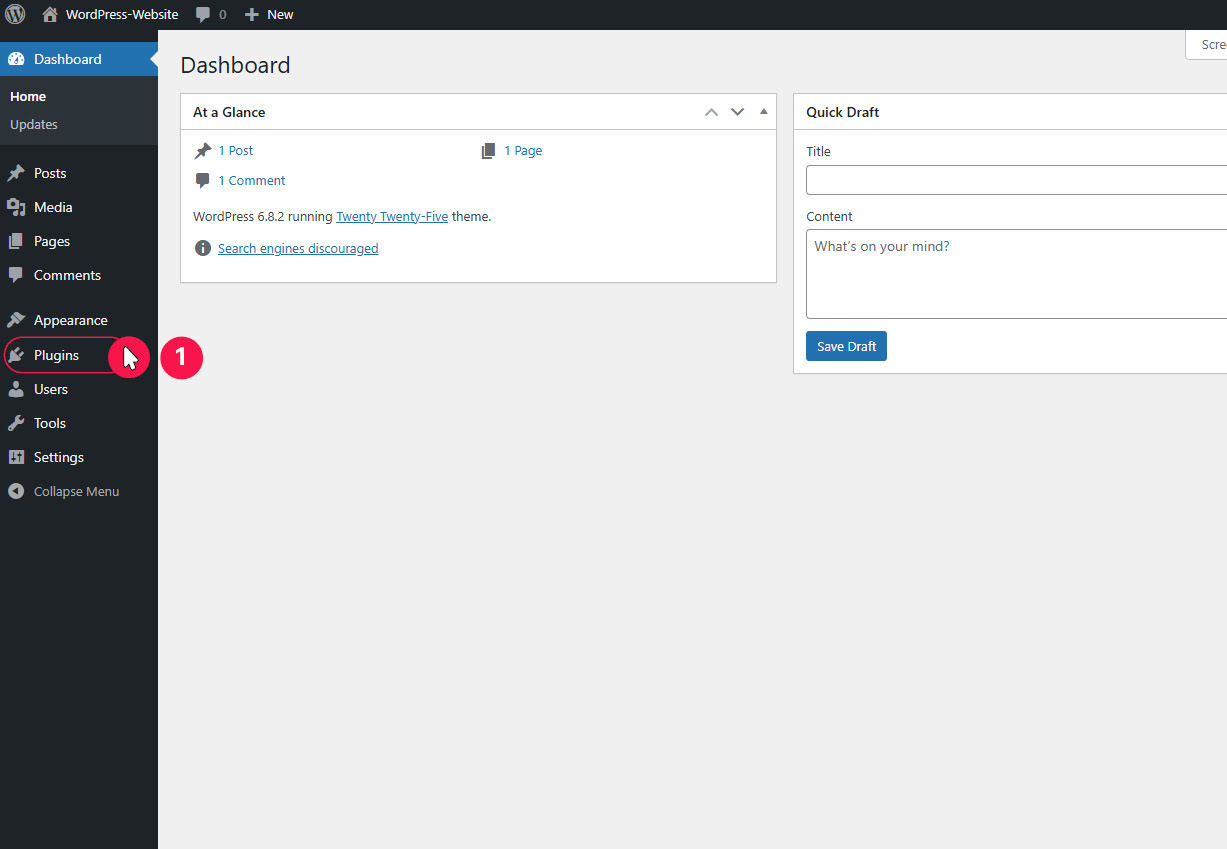
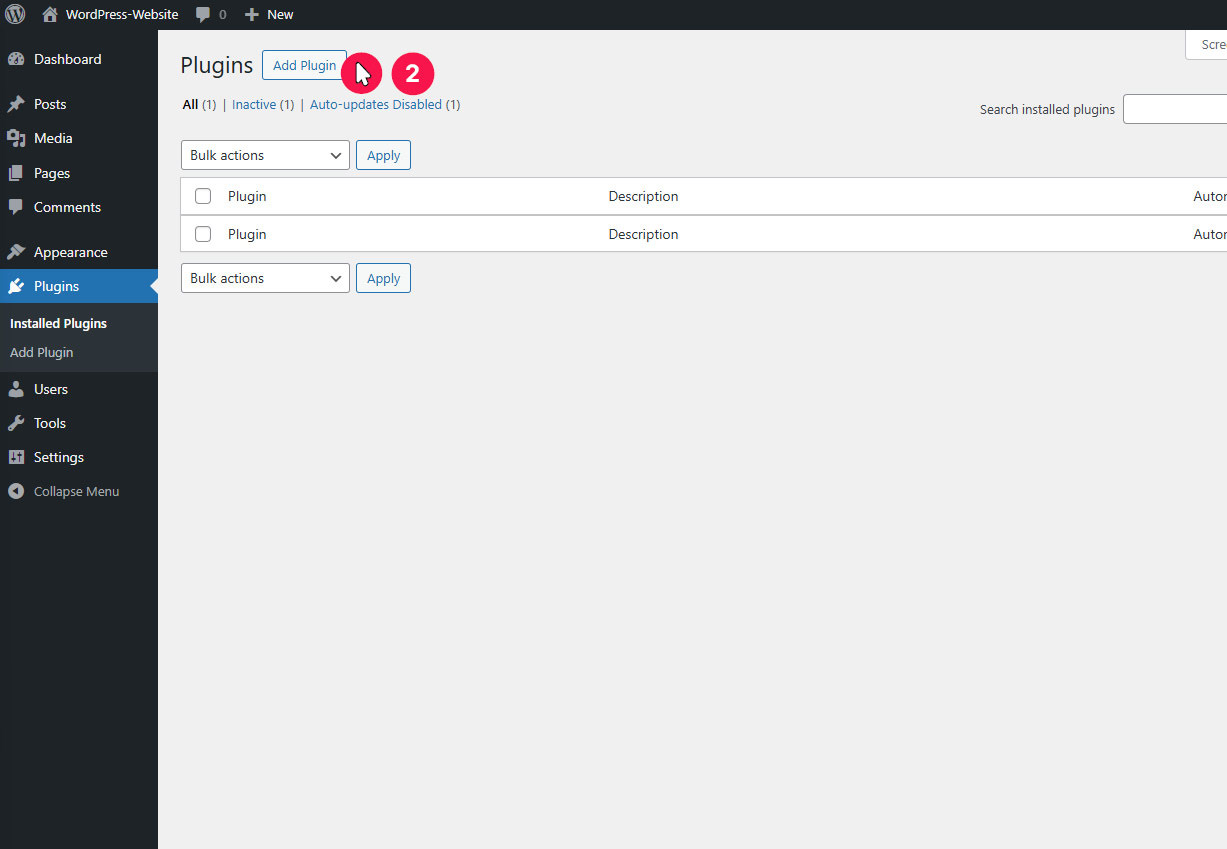
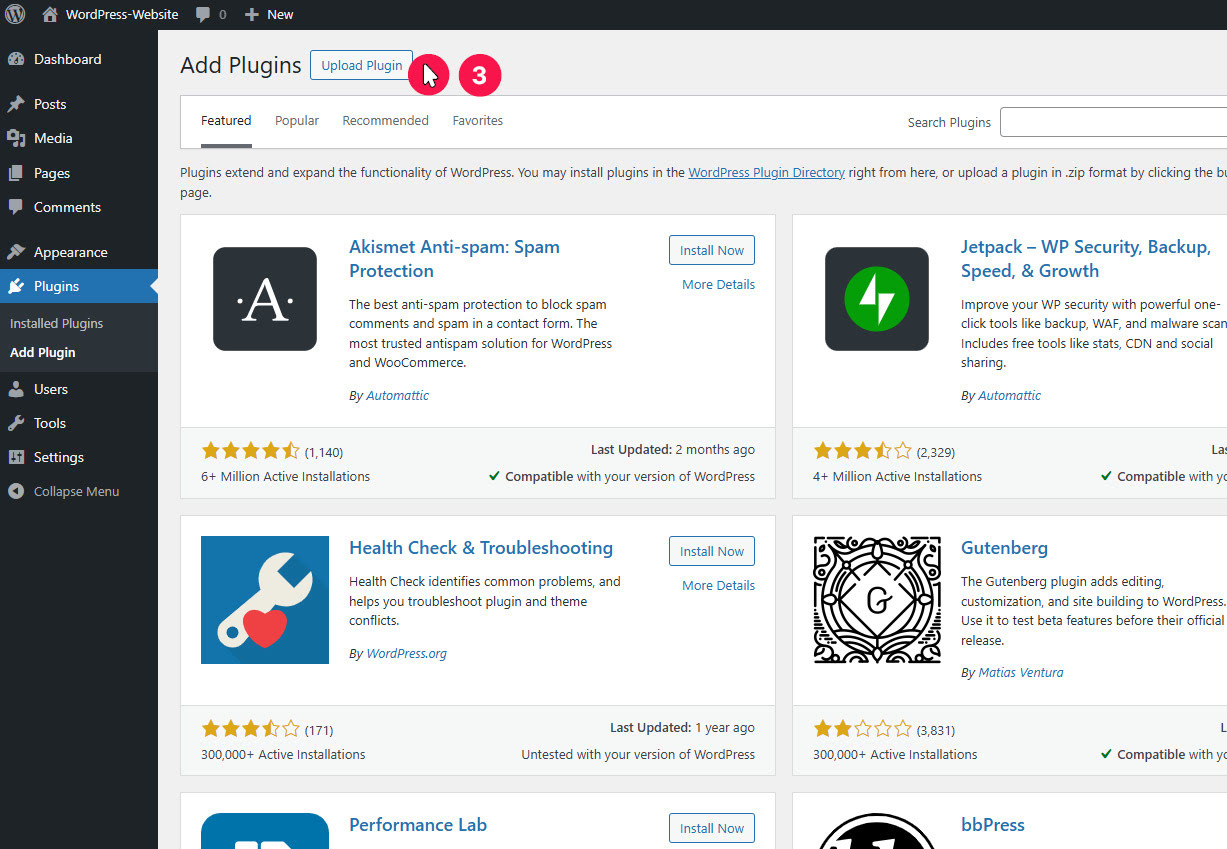
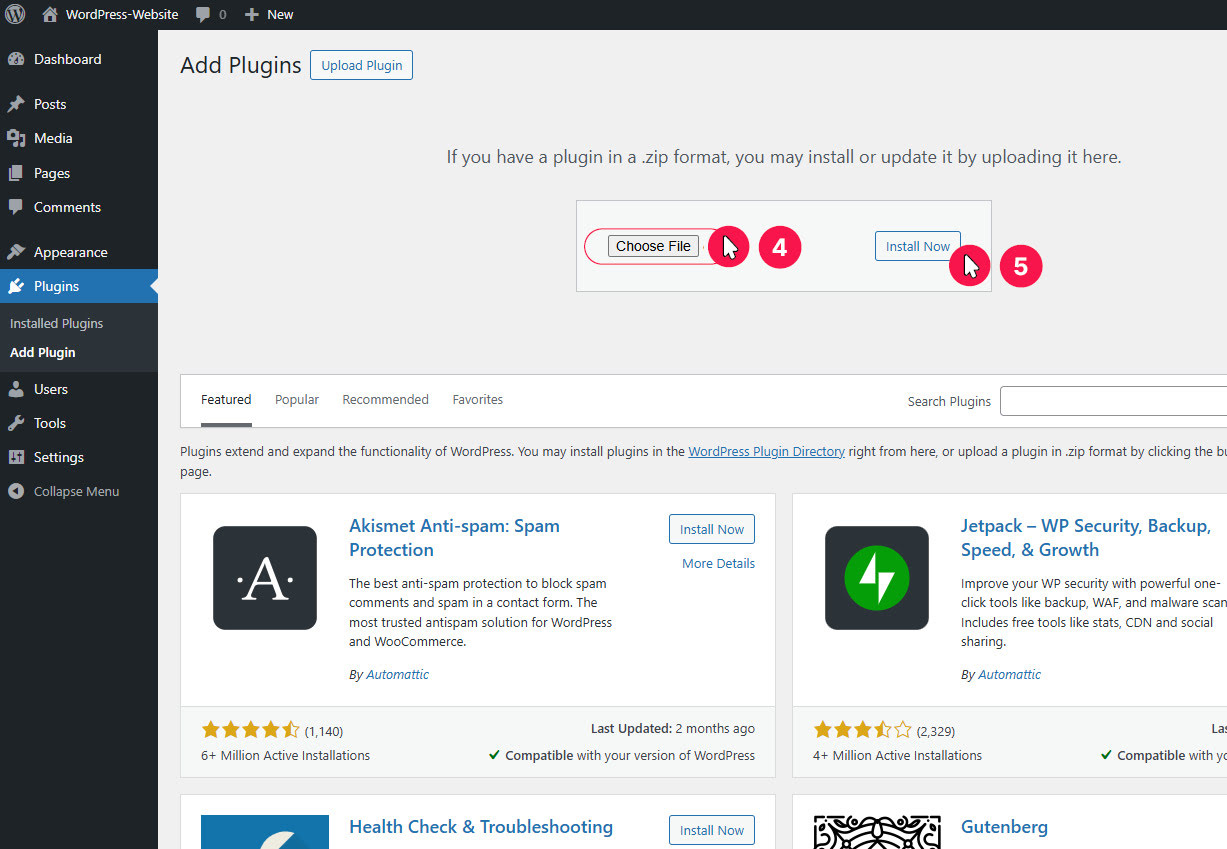
Install Cevento via FTP
FTP is a file transfer protocol for exchanging files between your device and your webspace. Cevento can also be installed via FTP. For this, you need a program that allows FTP access and the FTP login credentials to connect to your webspace. Contact your hosting provider if you don’t have them. On the Komplizinnen website (the masterminds behind Cevento), you will find a recommendation for an FTP program. Some hosting providers also offer a web interface for file management, which you can use instead. Then follow these steps:
- If your FTP program or hosting provider does not support extracting .zip files, first extract cevento.zip on your device.
- After connecting to your webspace, navigate to the WordPress plugin folder (default: wp-content/plugins).
- Upload the extracted folder named cevento to the plugins folder via FTP. If your FTP program or hosting provider supports extracting .zip files, you can also upload cevento.zip and then extract it there.
Activate Cevento
Immediately after installation, click Activate or go to the WordPress dashboard menu Plugins and click the link Activate under Cevento.
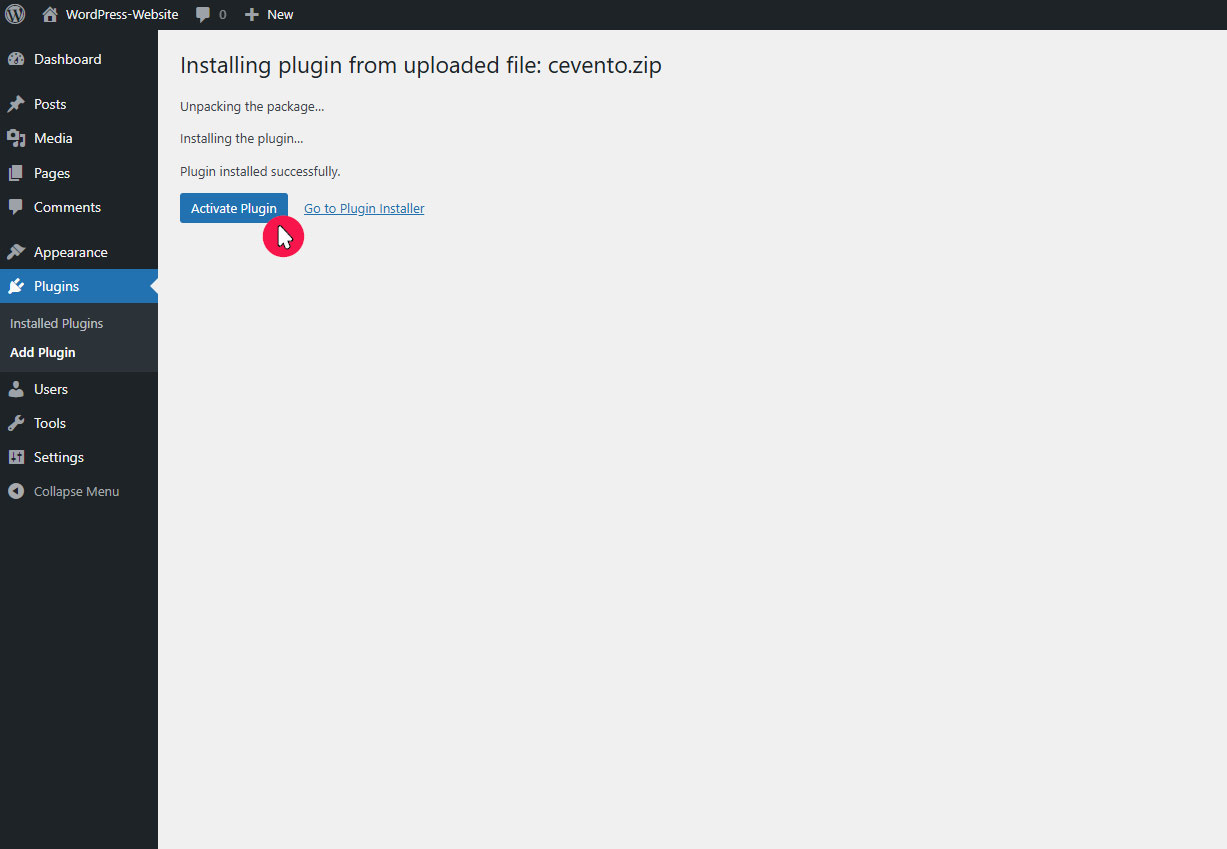
Activation directly after installation in the WordPress dashboard
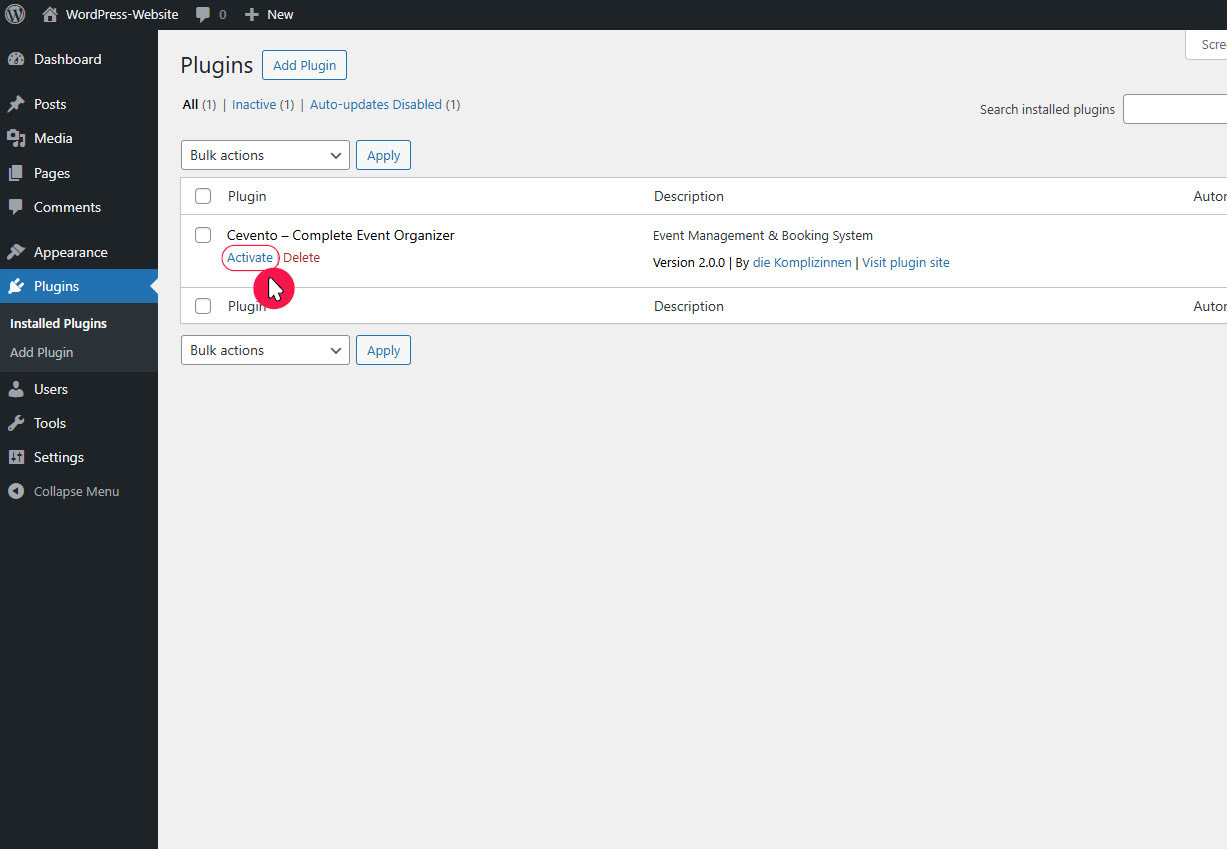
Activation in the Plugins menu, e.g. after installation via FTP
Activate License
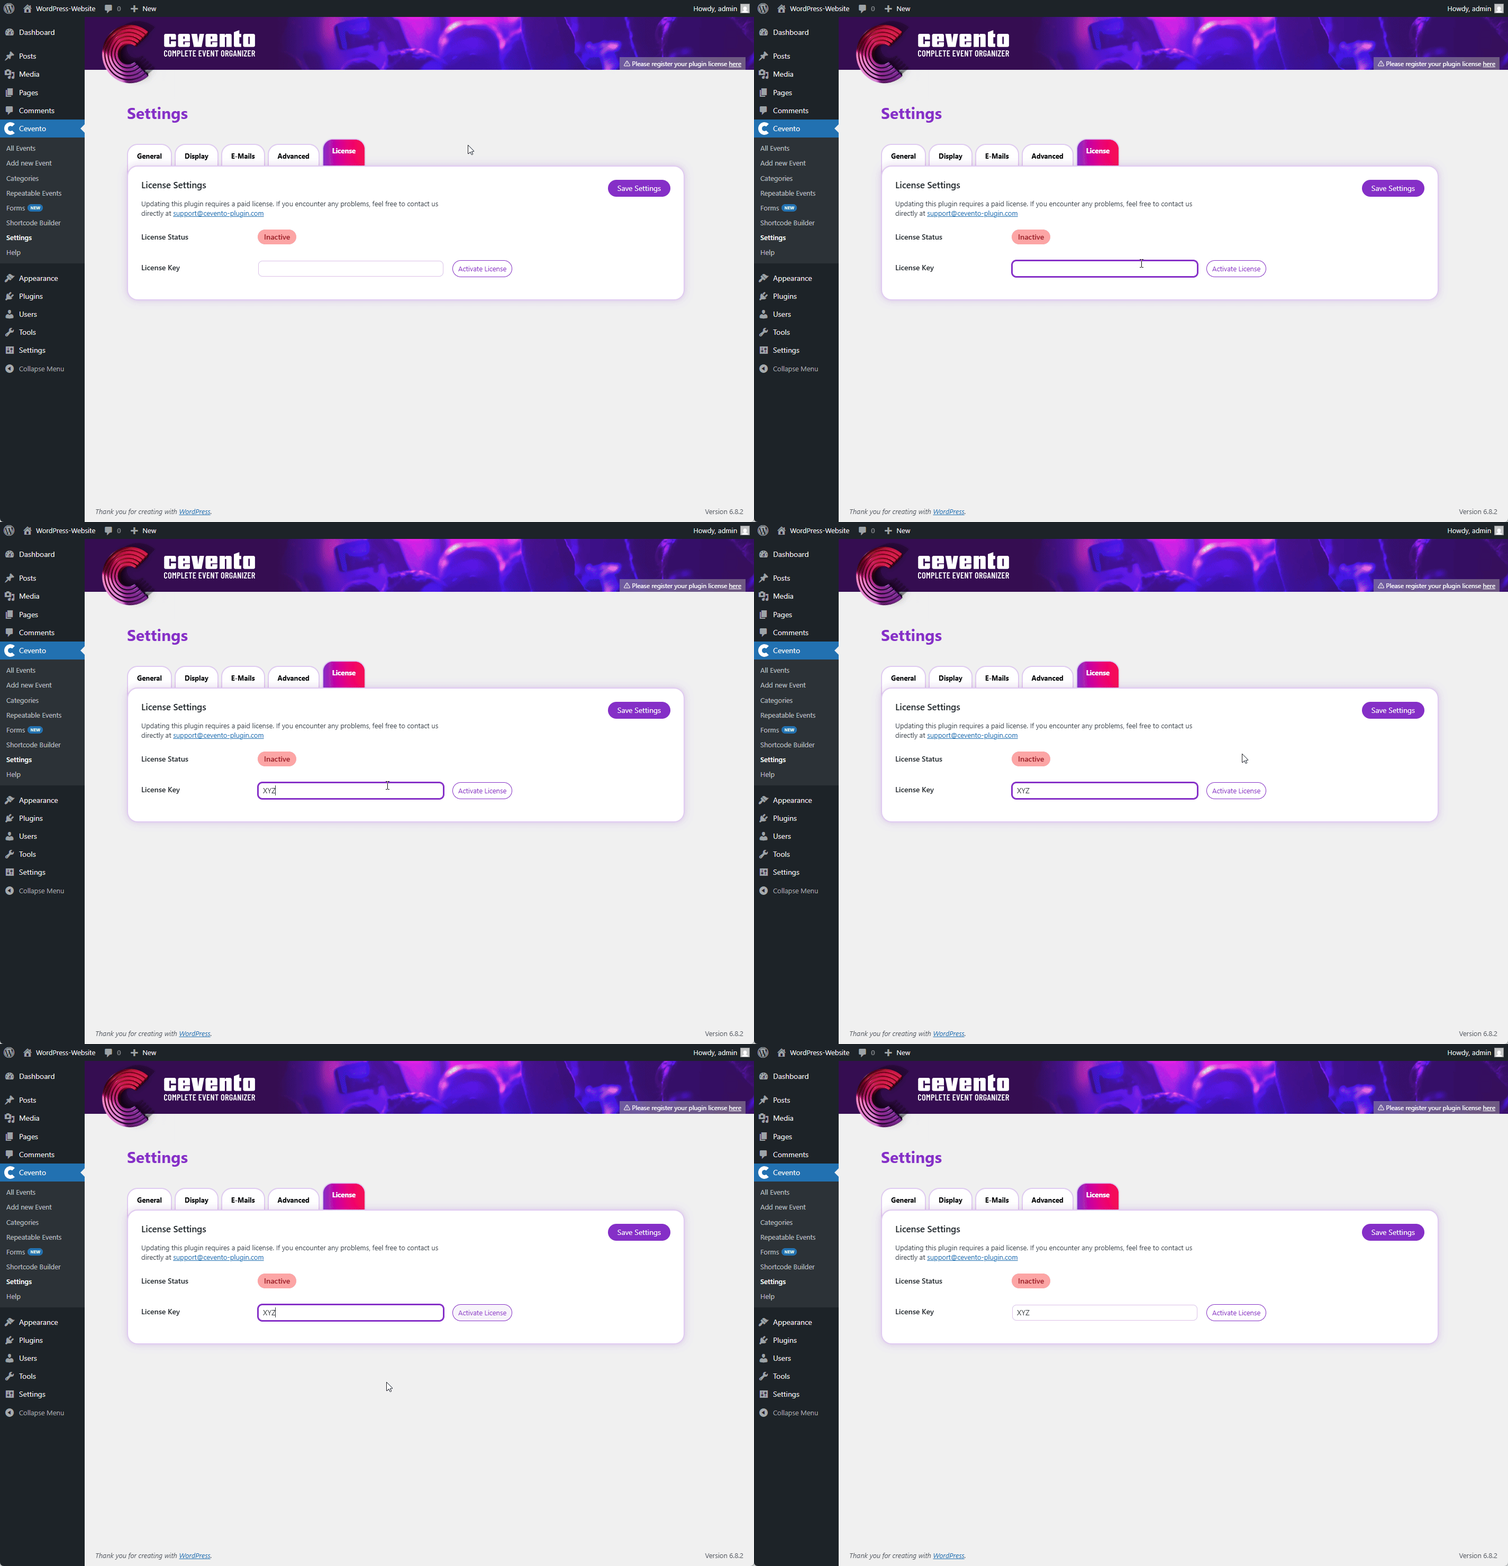
To receive all future Cevento updates in WordPress, you must enter your Cevento license key, which you received when purchasing the plugin, in the plugin settings. In the WordPress dashboard, go to Cevento → Settings. Then navigate to the License tab.
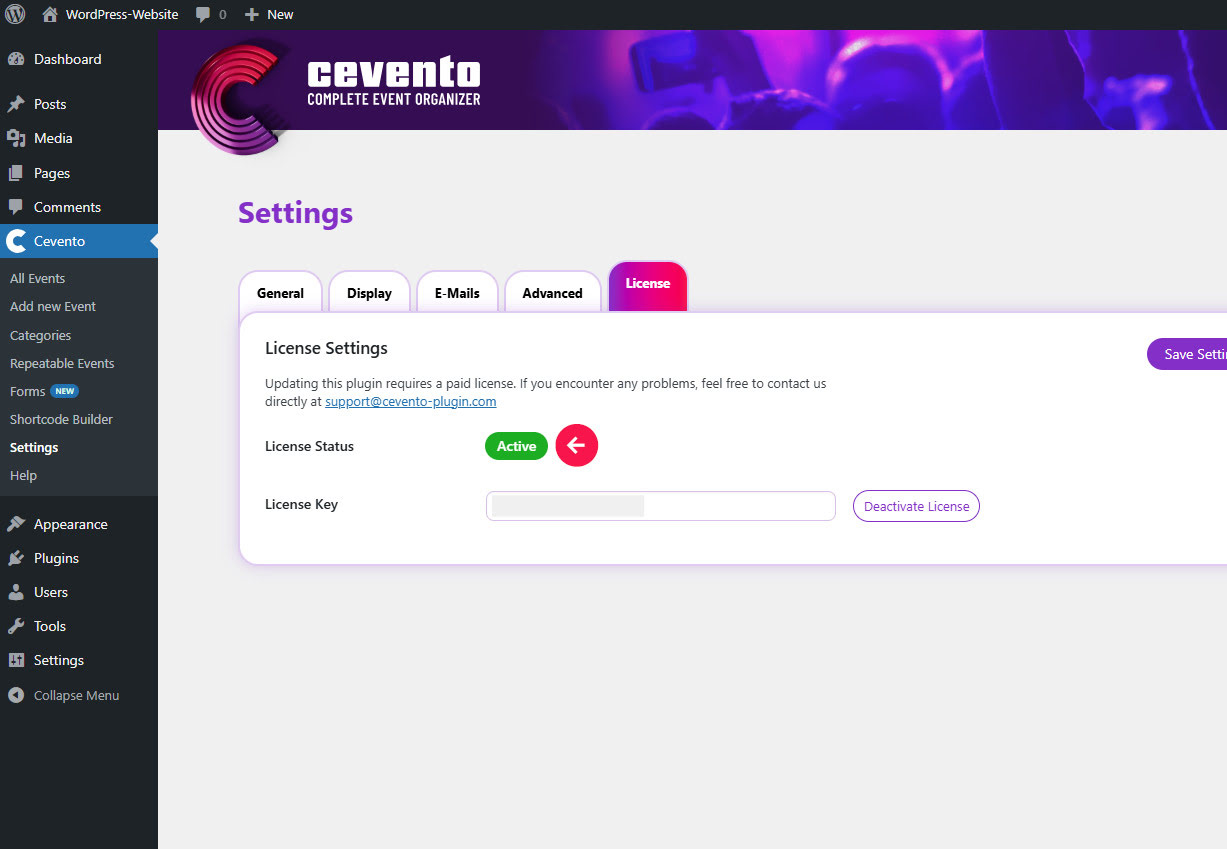
In the License tab, you will see the License Status and an input field for the License Key. Enter your License Key into the field and then click the button Save Settings in the top right corner. After loading, the License Status should change to Active.
Next steps
- Configure the desired Cevento settings.
- For an easy start, you will find a demo event and a demo form in the WordPress dashboard under Cevento → All Events and Forms. You can reuse them later.