Settings
In this post, we’ll walk you through:
You can configure global settings for Cevento in the WordPress dashboard under Cevento → Settings.
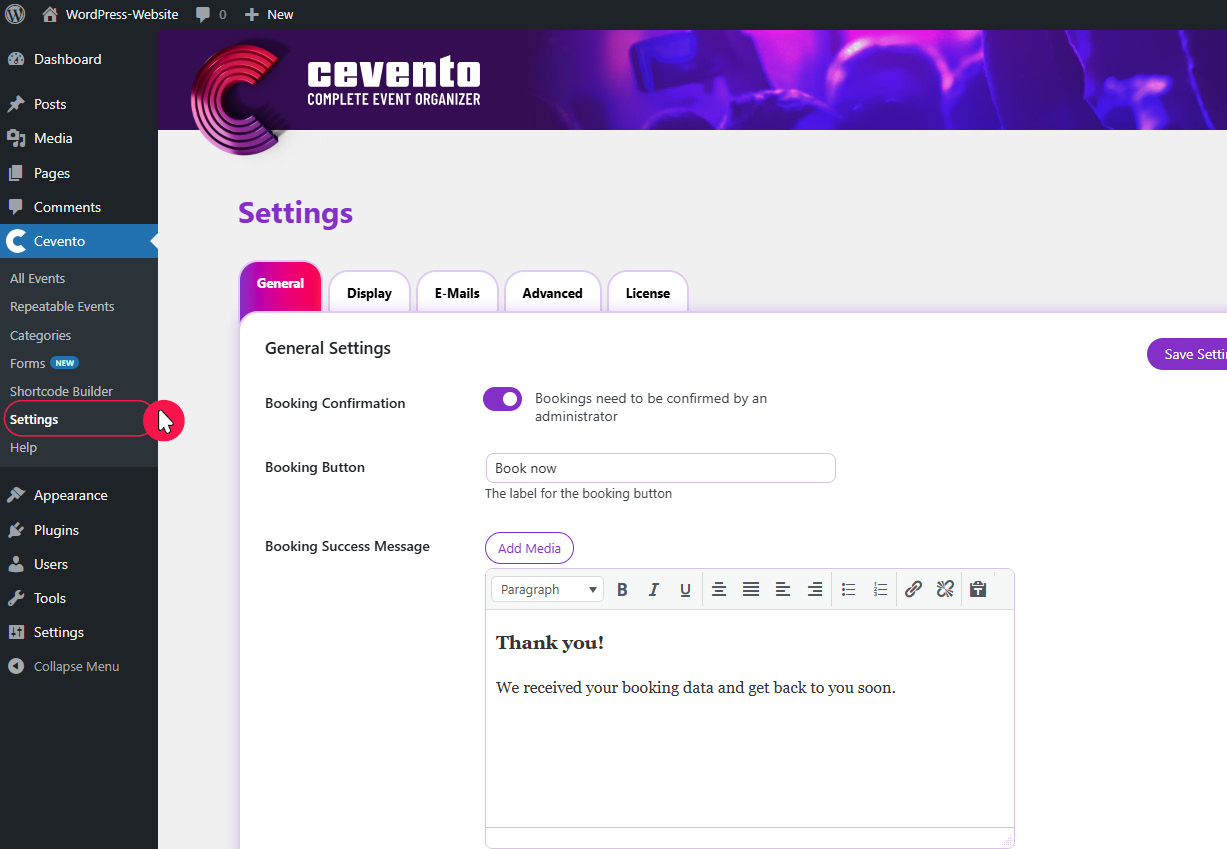
The settings are divided into several tabs. These may contain submenus. The following explains these tabs and their submenus in sequence.
- E-Mails → General: Admin E-Mails (This email address is used to notify you about new booking statuses.)
- E-Mails → New Booking, Booking Confirmation, Booking Cancellation (The texts stored here are sent to your users.)
Once you have finished configuring or changing settings within a tab, click the button Save Settings to save and apply your changes.
General
General Settings
Here you can enable booking confirmation and adjust related settings.
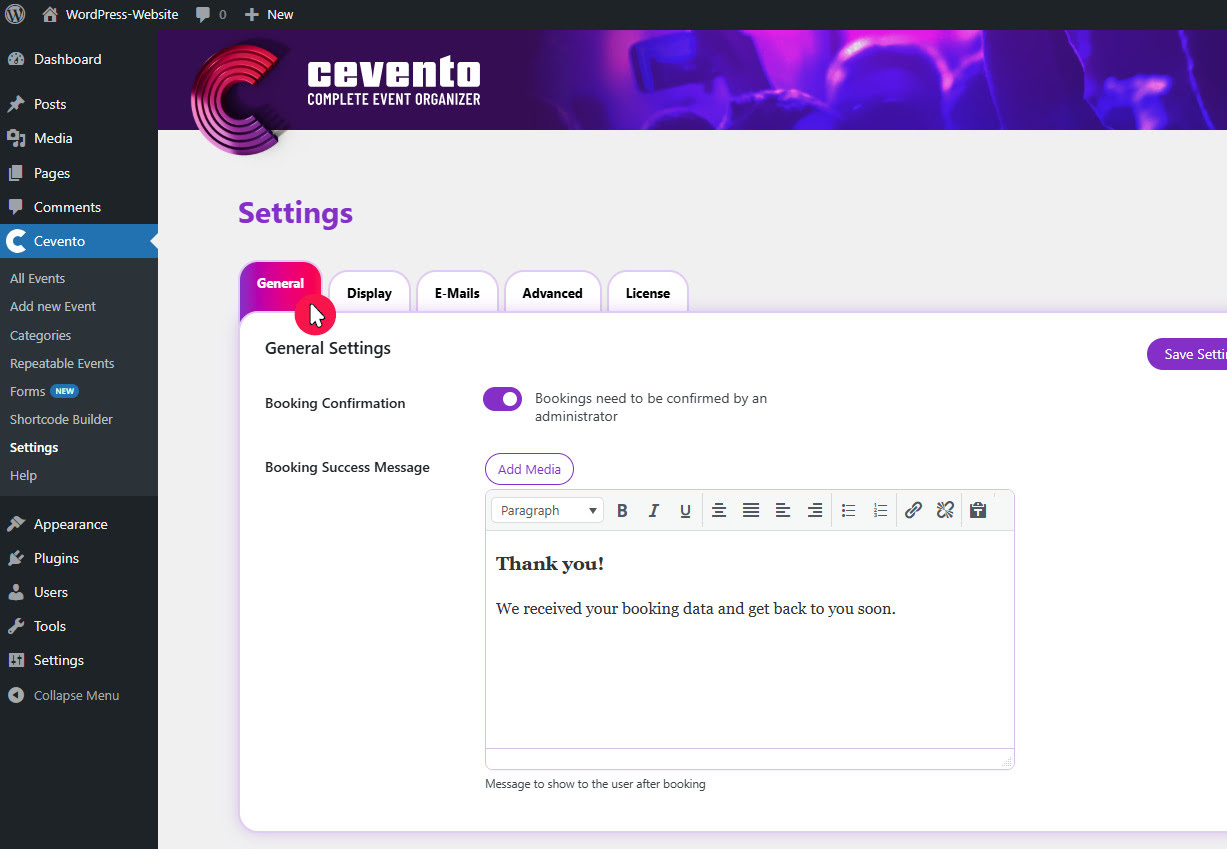
Booking Confirmation
Enable this switch next to Booking Confirmation if you want all bookings to require your approval before users receive a booking confirmation email.
If the switch Booking Confirmation is enabled, the email named New Booking will not be sent.
Booking Button
The text entered here will be displayed on the booking button on the event detail page.
Booking Success Message
The text entered here will be shown to users directly on the website after successfully submitting a booking.
Display
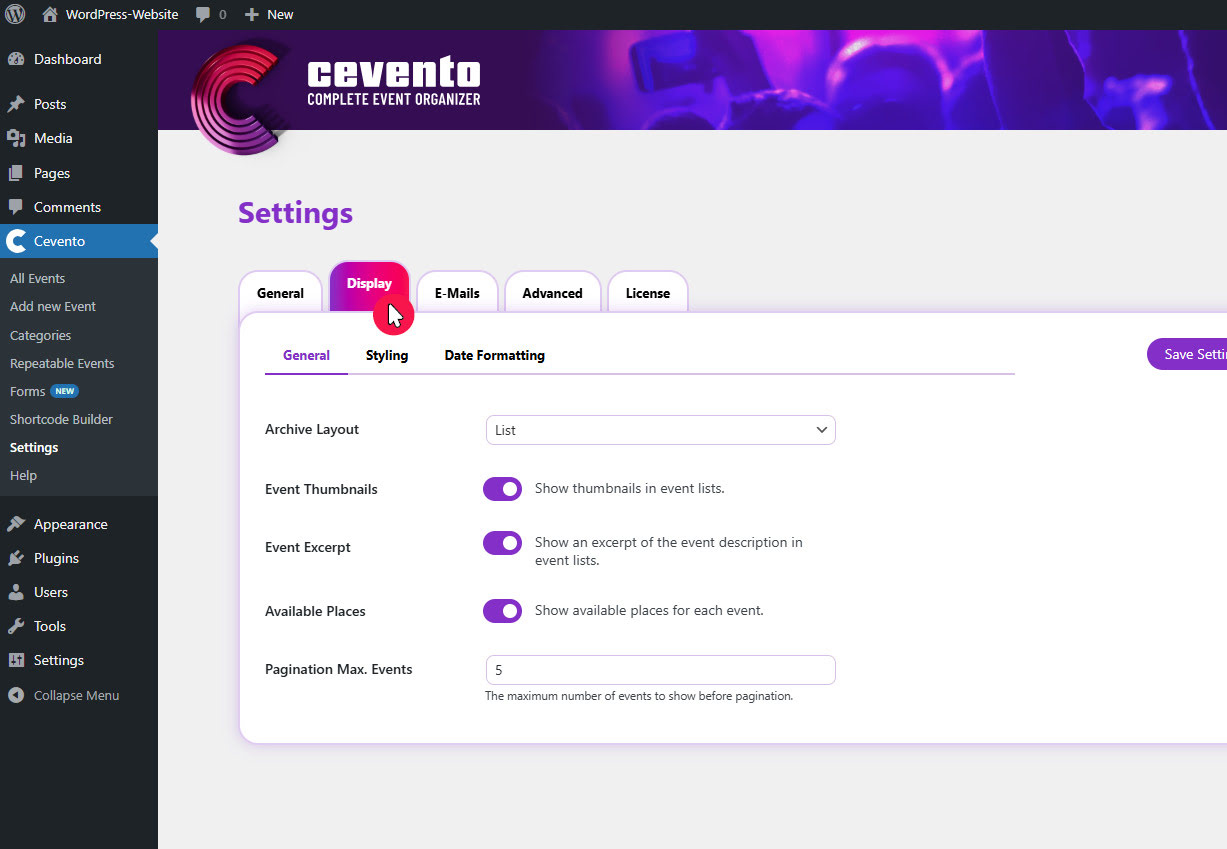
In this tab, you can configure settings that affect the layout and appearance of your event views as well as the date format.
General
In the first submenu you’ll find various layout settings.
Archive Layout
In this dropdown you can define the appearance of your event archives. Options are List, Grid, or Compact.
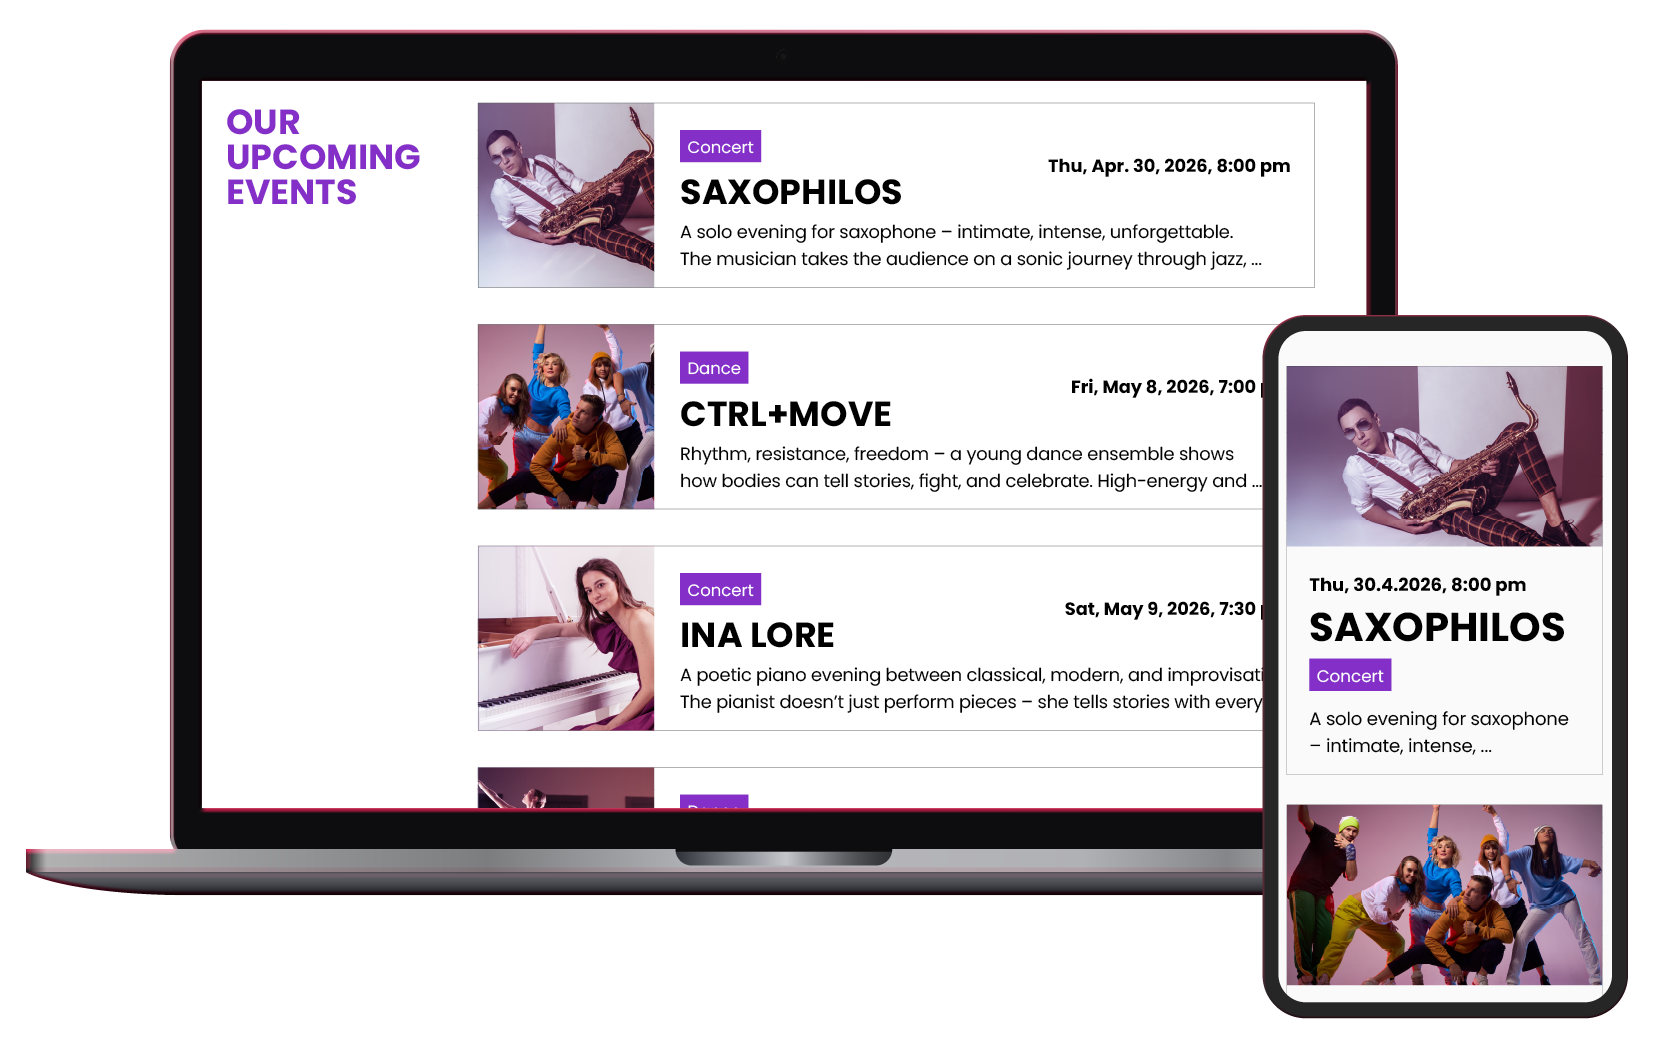
Example archive layout “List”
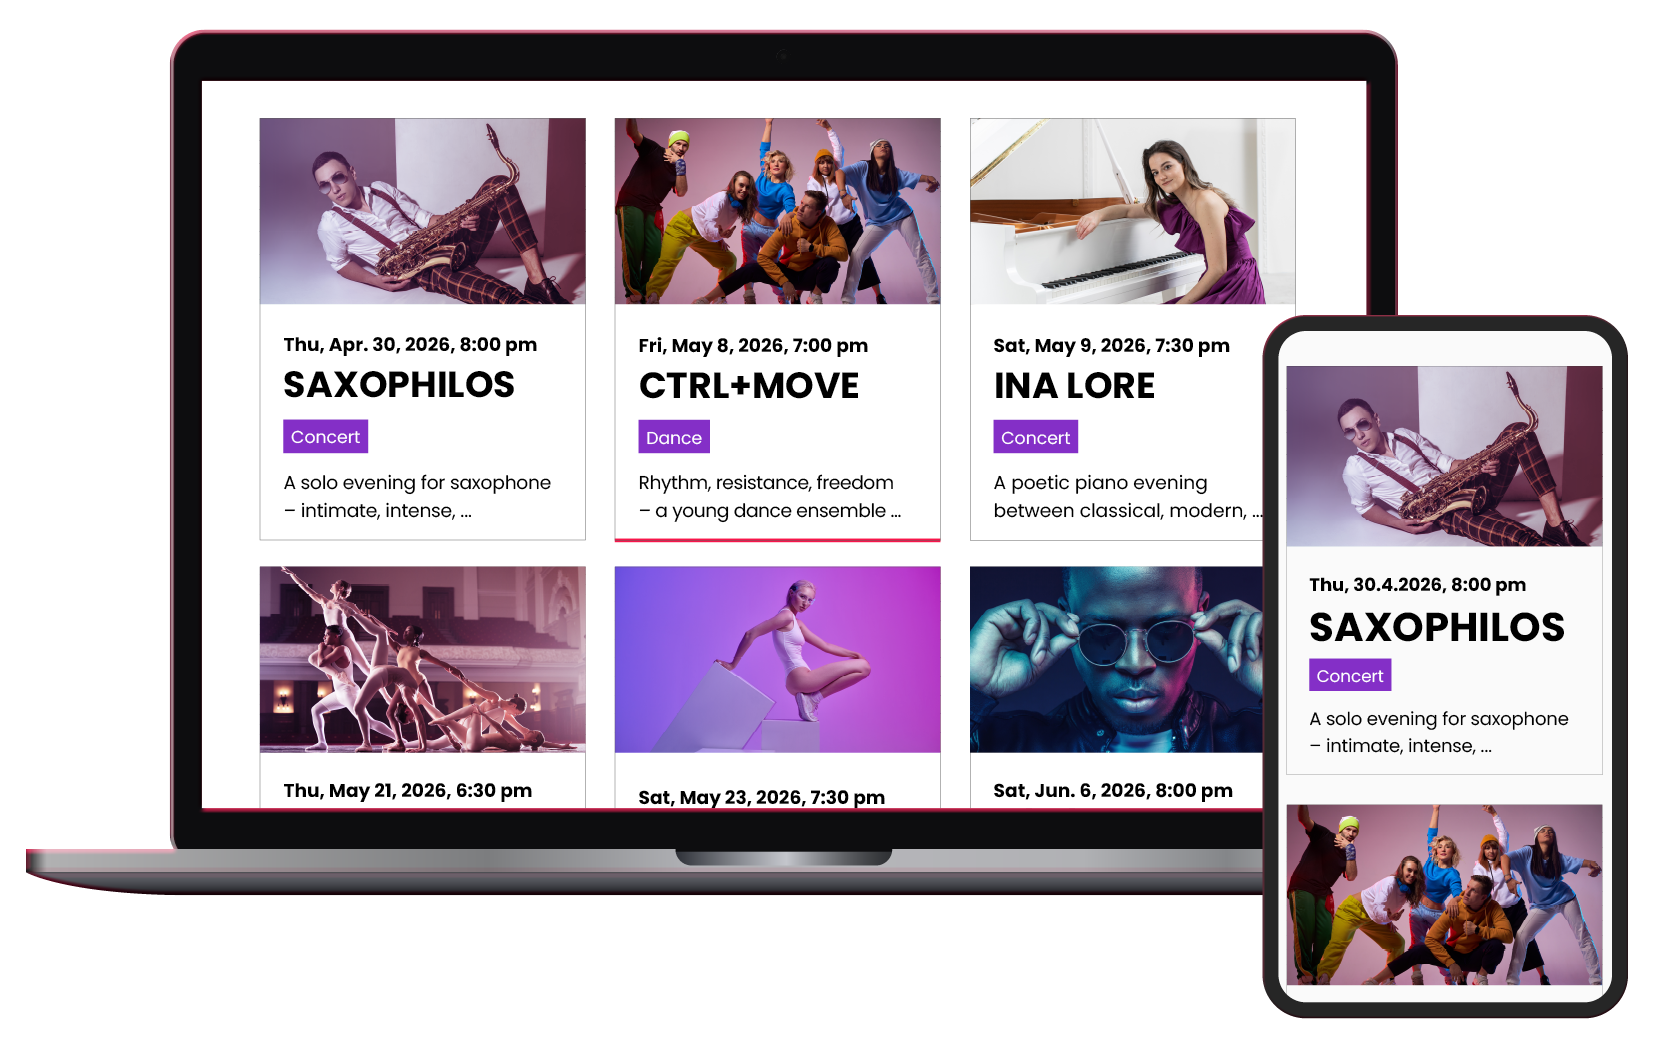
Example archive layout “Grid”
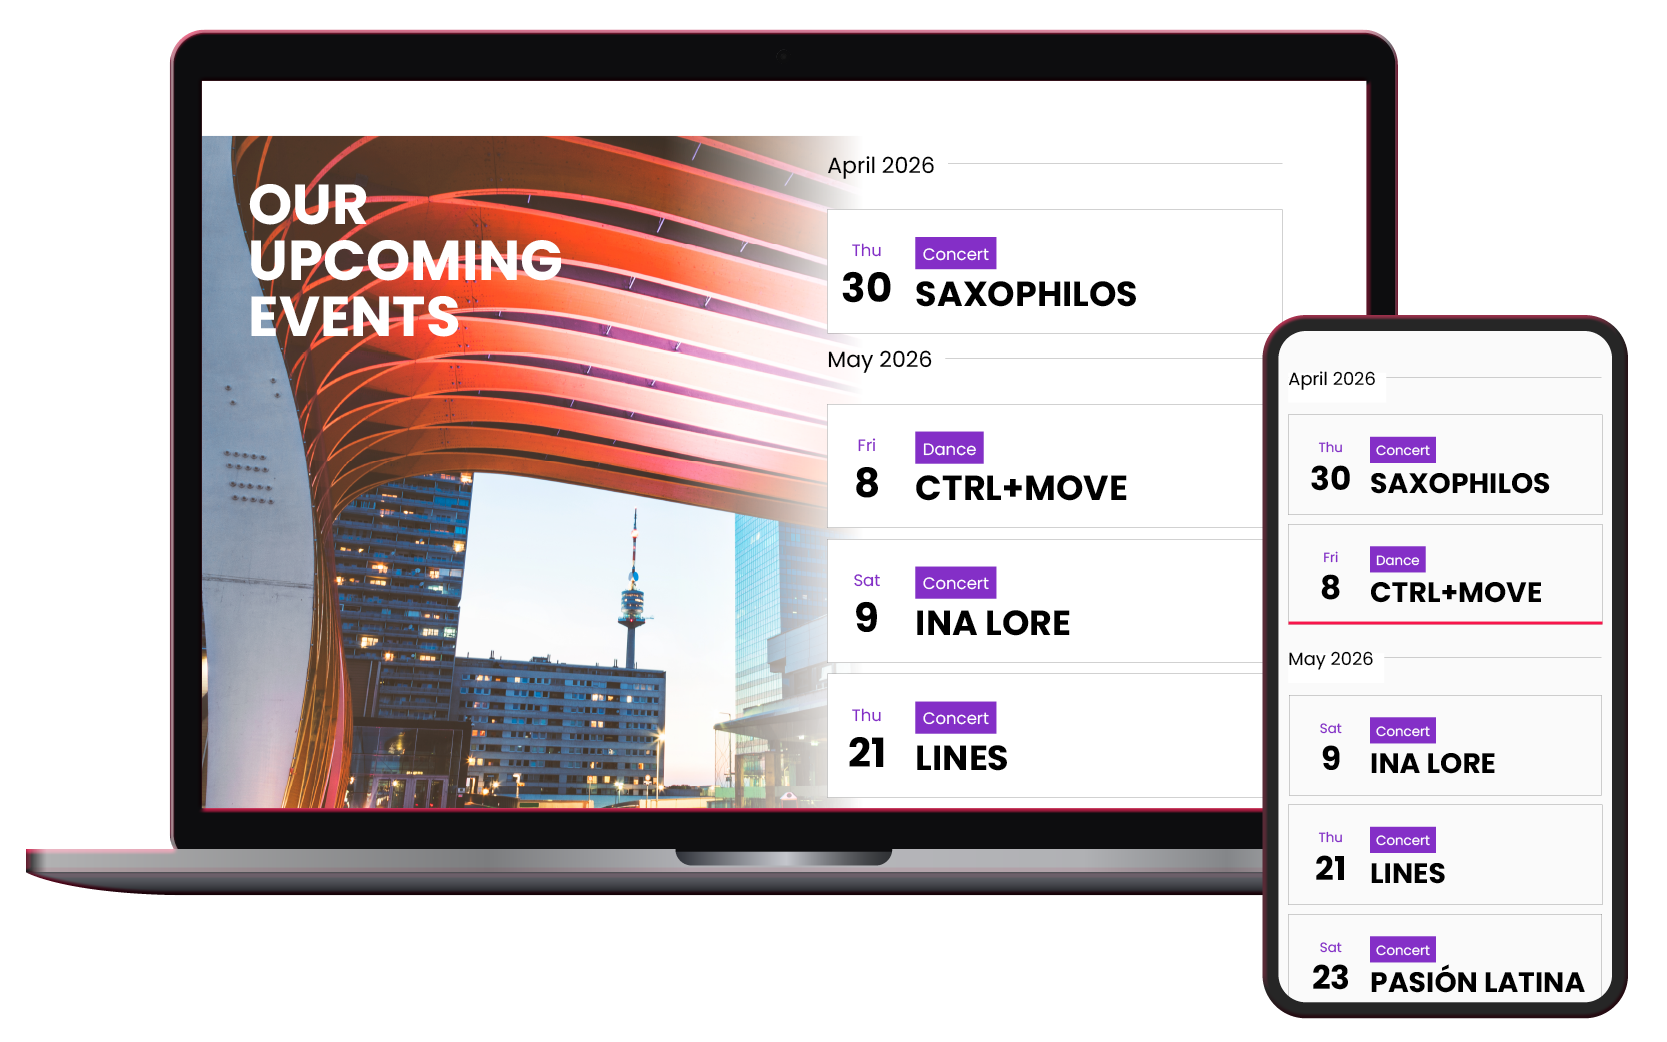
Example archive layout “Compact”
Event Thumbnails
Enable this switch to display small preview images (thumbnails) for each event in your event views.
Event Excerpt
Enable this switch to display an excerpt of the respective event description in your event lists.
Available spots
Enable this switch to show the available spots for each event. If enabled, your event views will display X spots available.
Pagination Max. Events
The maximum number of events displayed per page in your event archives. Events are split across multiple pages and pagination appears at the bottom for navigation.
Styling
In this tab, you can customize the appearance of your event views.
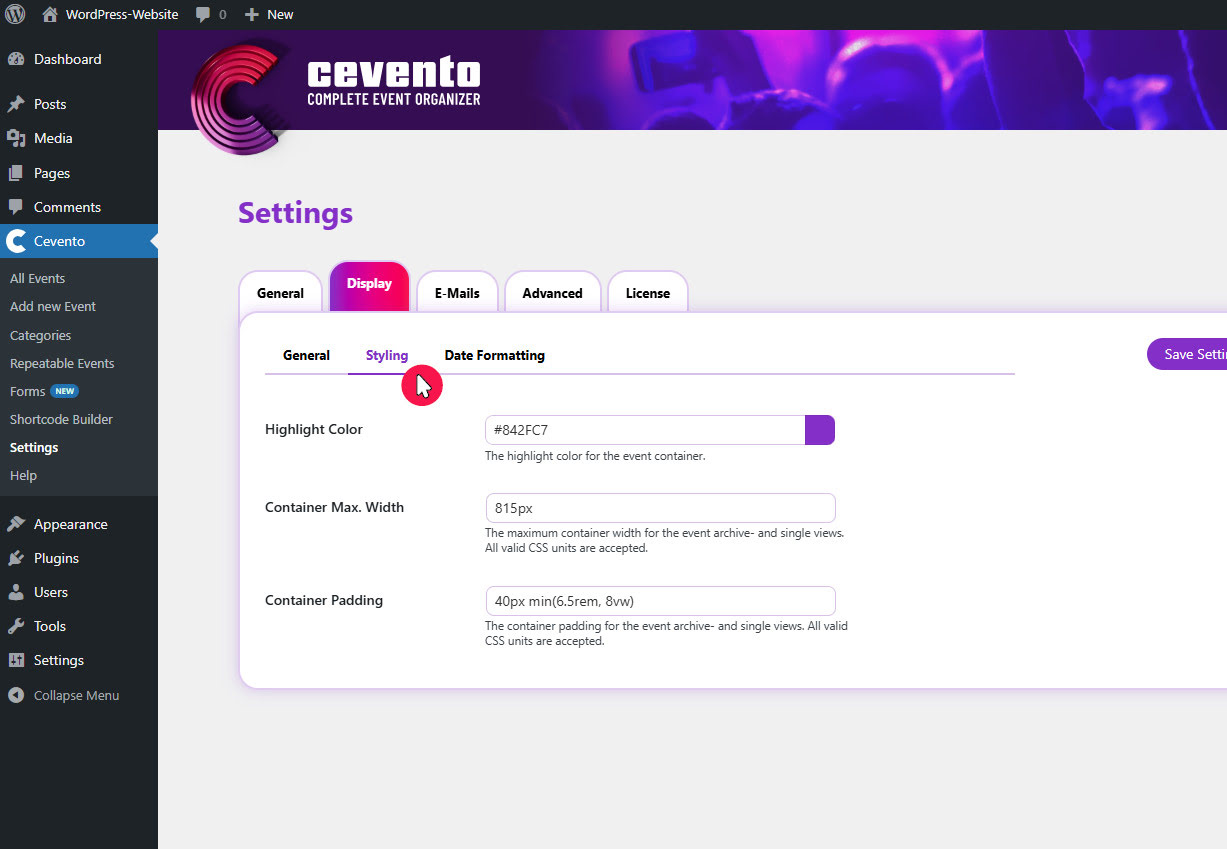
Highlight Color
Use this color picker to define the accent color within the event display on your website.
Container Max. Width
Here you can set the maximum width of the event container. This applies to event archives and event detail pages. All valid CSS units are accepted.
Container Padding
The value entered here defines the inner spacing of the event container to its content. This applies to event archives and event detail pages. All valid CSS units are accepted.
Date Formatting
The following settings control the format for displaying dates in event views and booking requests. All formats supported by PHP DateTimeInterface are accepted.
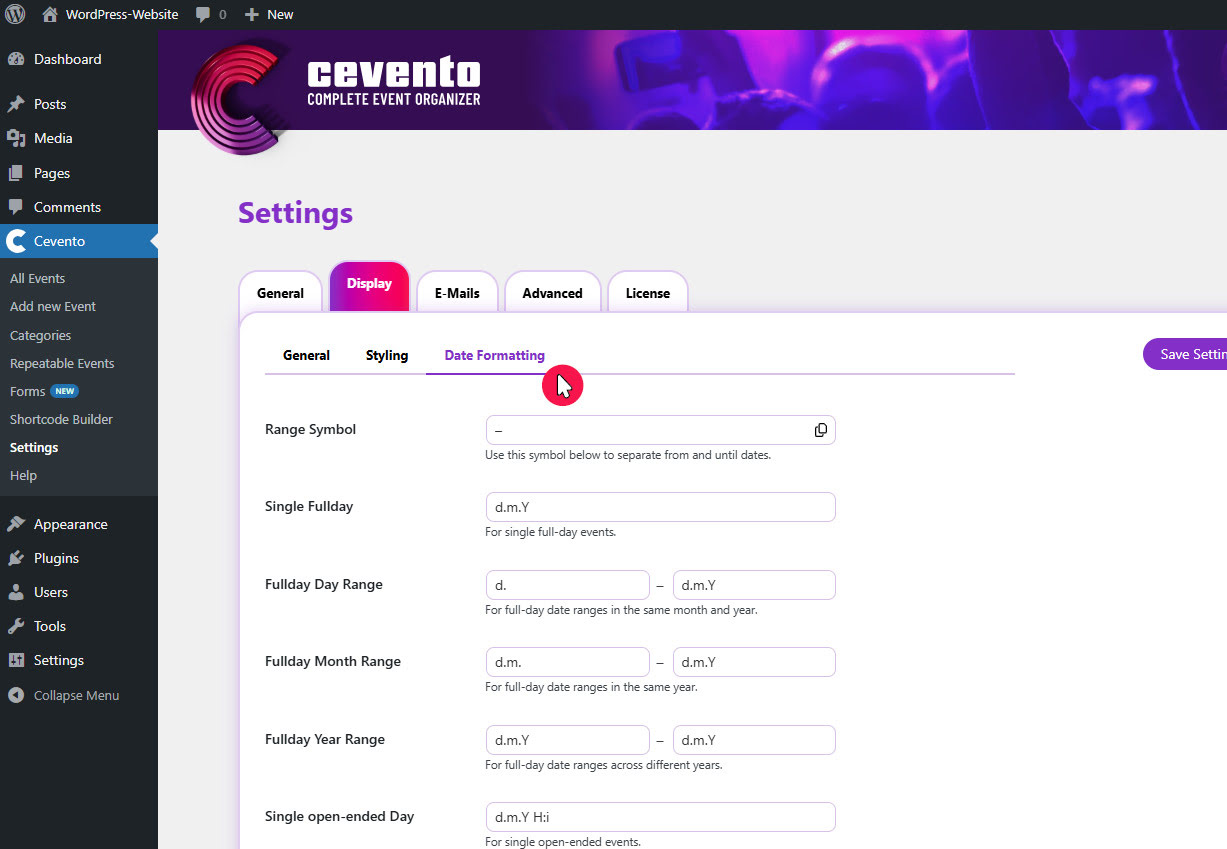
Range Symbol
This symbol is used to separate the start from the end date. By default, a dash (–) is set. You can replace the default with any character. Once the settings are saved, your chosen symbol will also appear in the settings view. You can copy the symbol using the small icon in the input field.
Single Full Day
This format is used for single all-day events. (Default: d.m.Y)
Full-Day Day Range
This format applies to date ranges with single all-day events in the same month and year. (Default: d. – d.m.Y)
Full-Day Month Range
This format is used for events spanning a full-day range within the same year. (Default: d.m. – d.m.Y)
Full-Day Year Range
This format applies to single all-day events spanning multiple years. (Default: d.m.Y – d.m.Y)
Single Open-Ended Day
This format is used for events with no defined end. (Default: d.m.Y H:i)
Single Day
This format applies to events starting and ending on the same day. (Default: d.m.Y H:i – H:i)
Day Range
This format is used for multi-day events within the same month. (Default: d. – d.m.Y H:i)
Month Range
This format applies to multi-day events in the same year spanning several months. (Default: d.m. H:i – d.m.Y H:i)
Year Range
This format is used for multi-day events spanning multiple months and years. (Default: d.m.Y H:i – d.m.Y H:i)
System Date Format
This format is used to display data in booking requests. (Default: d.m.Y)
E-Mails
In this tab you can configure settings for emails sent by Cevento. Important information and tips about emails can be found in the document Emails.
General
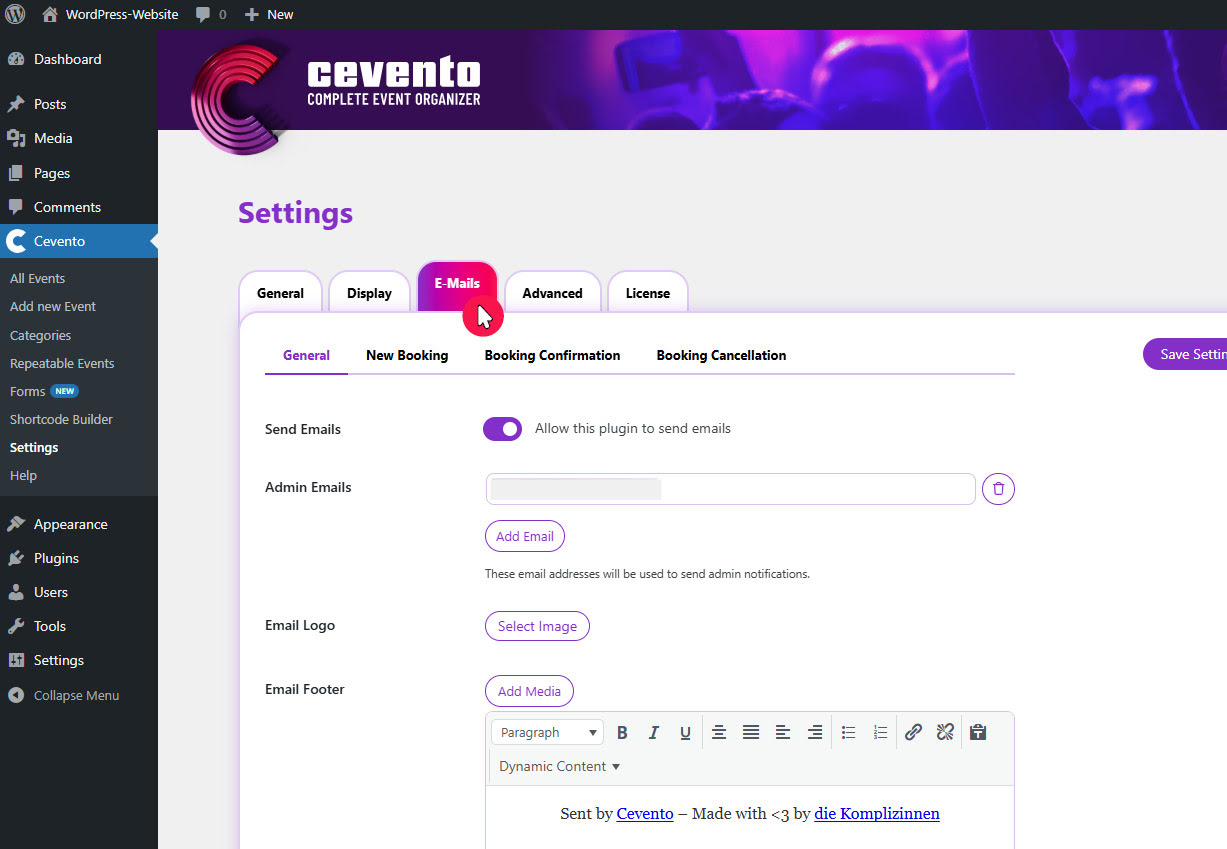
Send Emails
If this switch is enabled, Cevento may send emails. If disabled, no emails will be sent to you or your users – even if Email Templates are filled in the settings or event editing.
Admin E-Mails
This email address is used to notify you about new booking statuses. You can enter multiple addresses by providing a comma-separated list (example: support@cevento-plugin.at,example@cevento-plugin.at). (Default: the administrator email set in the WordPress dashboard under Settings → General.)
If no email address is entered here, no emails will be sent to admins.
E-Mail Logo
The image file stored here (your logo) will appear at the top of all emails sent by Cevento. To upload a logo, click the button Select Image and select an image from your WordPress media library. To remove the logo, click the red button with the X at the bottom left of the image.
E-Mail Footer
The content entered here will be added to the end of all emails sent by Cevento.
E-Mail Templates
Cevento can send emails in the context of three booking events: New Booking, Booking Confirmation, Booking Cancellation. Here you will find the settings that define the template of each email. Each tab provides two emails per booking event. More details can be found in the document Emails.
For each booking event, one email can be sent to the user and one to admins. If you leave the subject or content of the respective email empty, the email will not be sent.
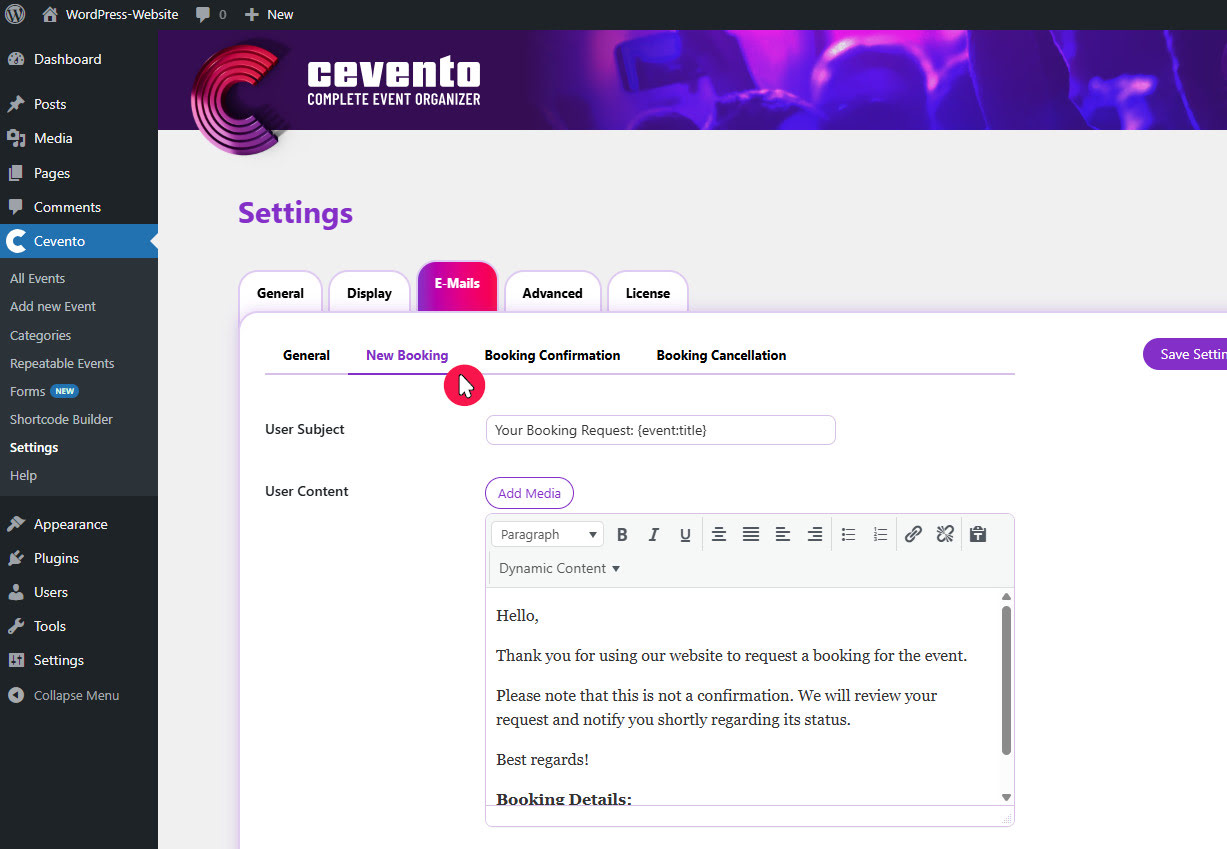
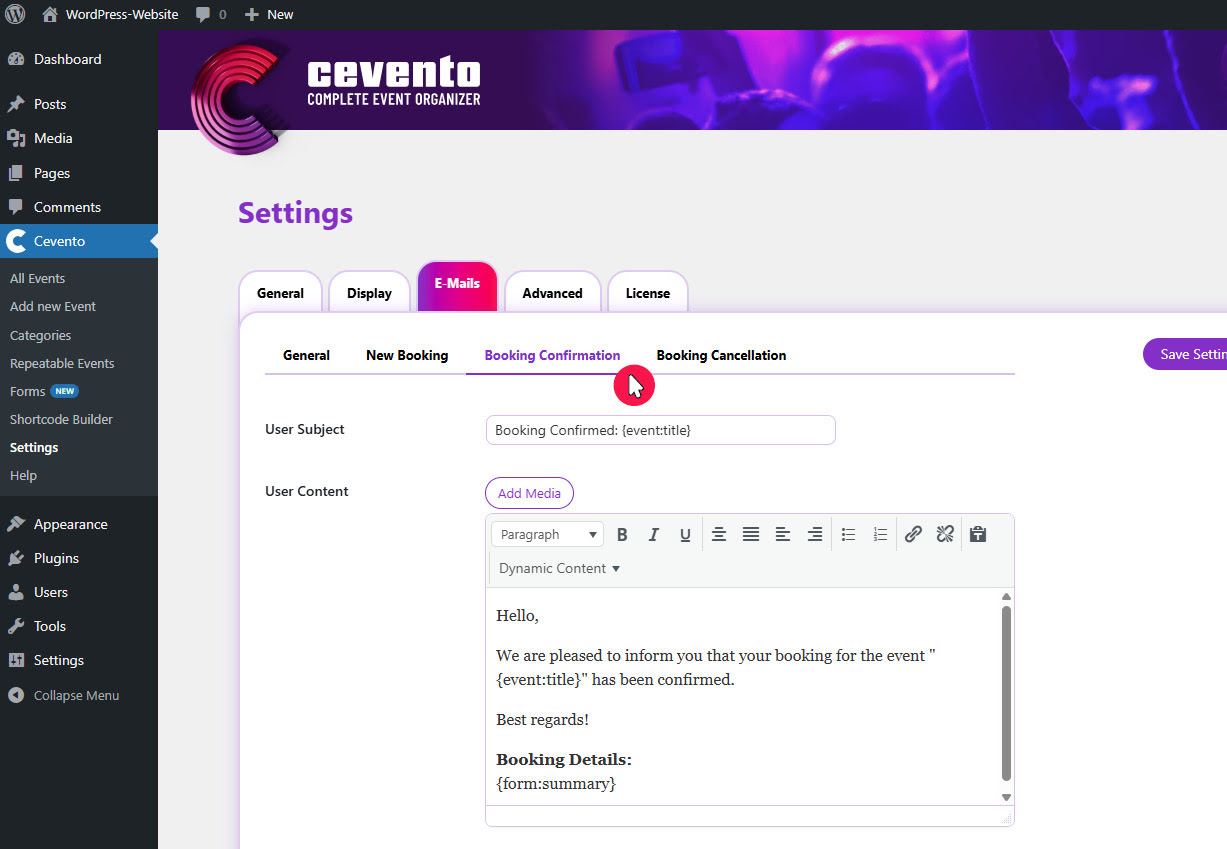
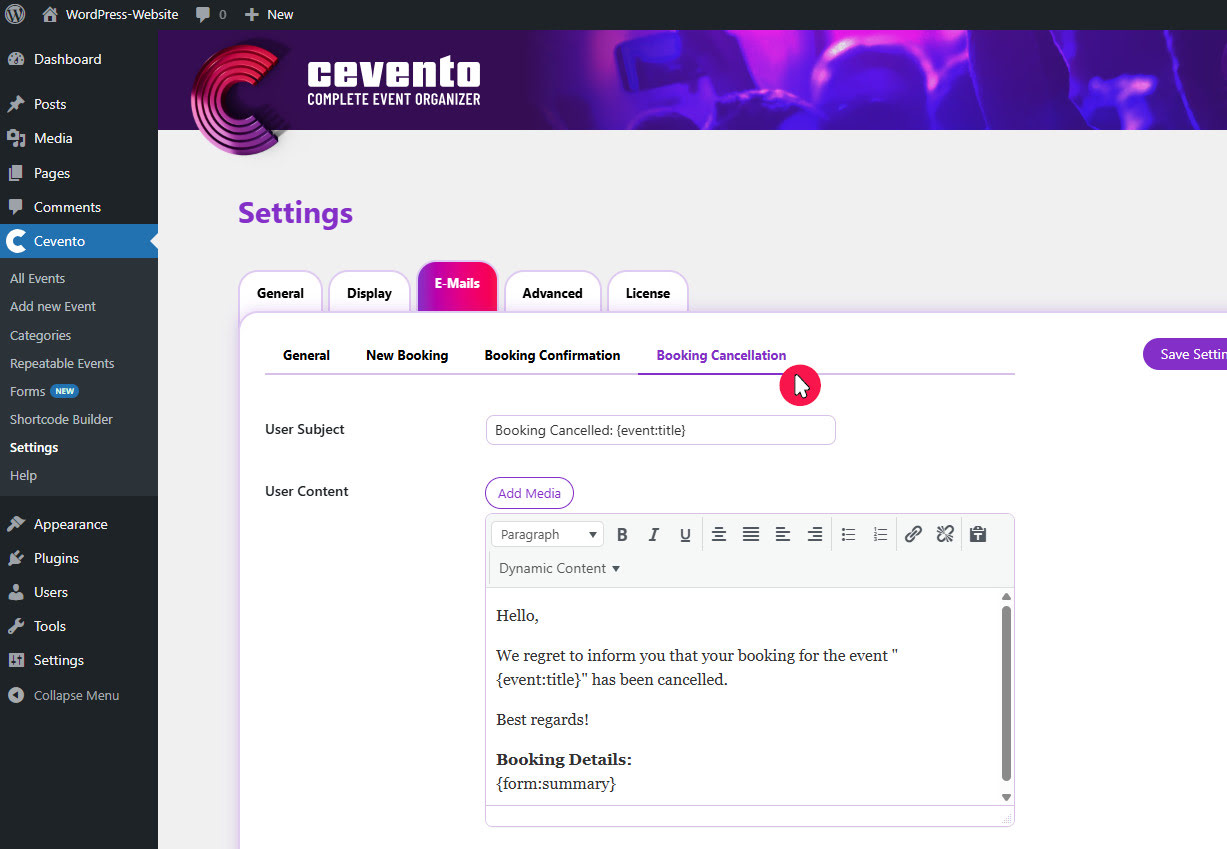
User Subject
The text entered here will be used as the subject line of the respective email sent to users.
User Content
These texts will be used as the content of the respective email sent to users.
Admin Subject
The text entered here will be used as the subject of the respective email sent to admins.
Admin Content
These texts will be used as the content of the respective email sent to admins.
Advanced
In this tab you will find settings related to the plugin’s technical capabilities.
Advanced Settings
Here you’ll find settings that should be used with caution. For most of them, it is helpful if you have some technical knowledge in this area.
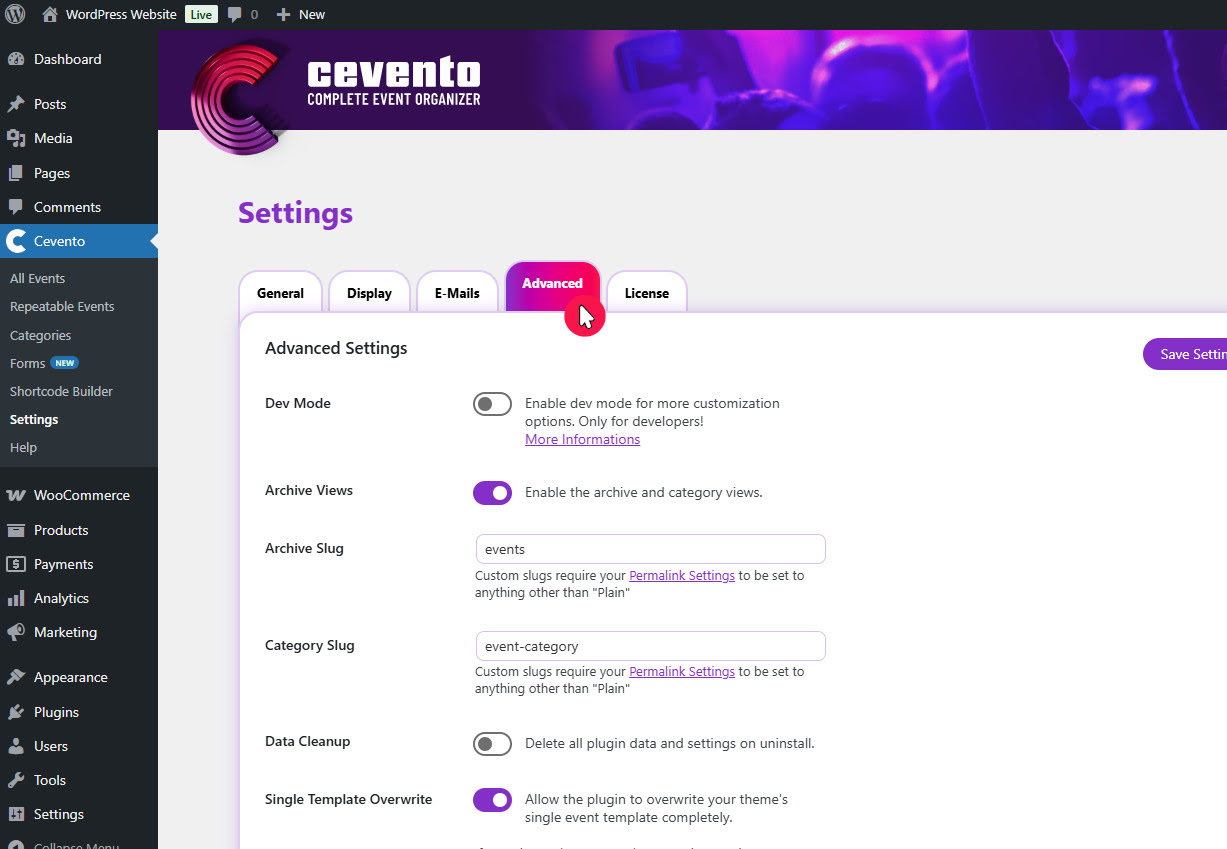
Dev Mode
If you have some knowledge of HTML, you can enable this switch. Once enabled, two links will appear above each text editor allowing you to switch between two views (Visual and Code). This allows you to edit the HTML code of text editor contents.
Archive Views
If you enable this switch, archive and category views will be added to your website. If this switch is disabled, you can only display event output on your website via shortcodes.
Archive Slug
The text entered here forms the basis of the URL for the event archive and event detail pages. Only letters, hyphens, and underscores are allowed.
Category Slug
The text entered here forms the basis of the URLs of the category archives. Only letters, hyphens, and underscores are allowed.
Data Cleanup
Enable this switch if you want all plugin and settings data of Cevento to be deleted upon uninstalling the plugin.
Single Template Overwrite
It is advisable to treat this setting with care. Having a good understanding of programming for WordPress is of advantage. This setting allows the plugin to completely overwrite your theme’s single event view. By default, the switch is active, which means that the plugin attempts to load the theme’s header and footer in the single event view.
Deactivate this option if your theme is not displayed correctly in the event single view (e.g. faulty display of header, footer or layout). This will insert the event content directly via the the_content WordPress hook.
License
In this tab you will find all important information about the plugin license.
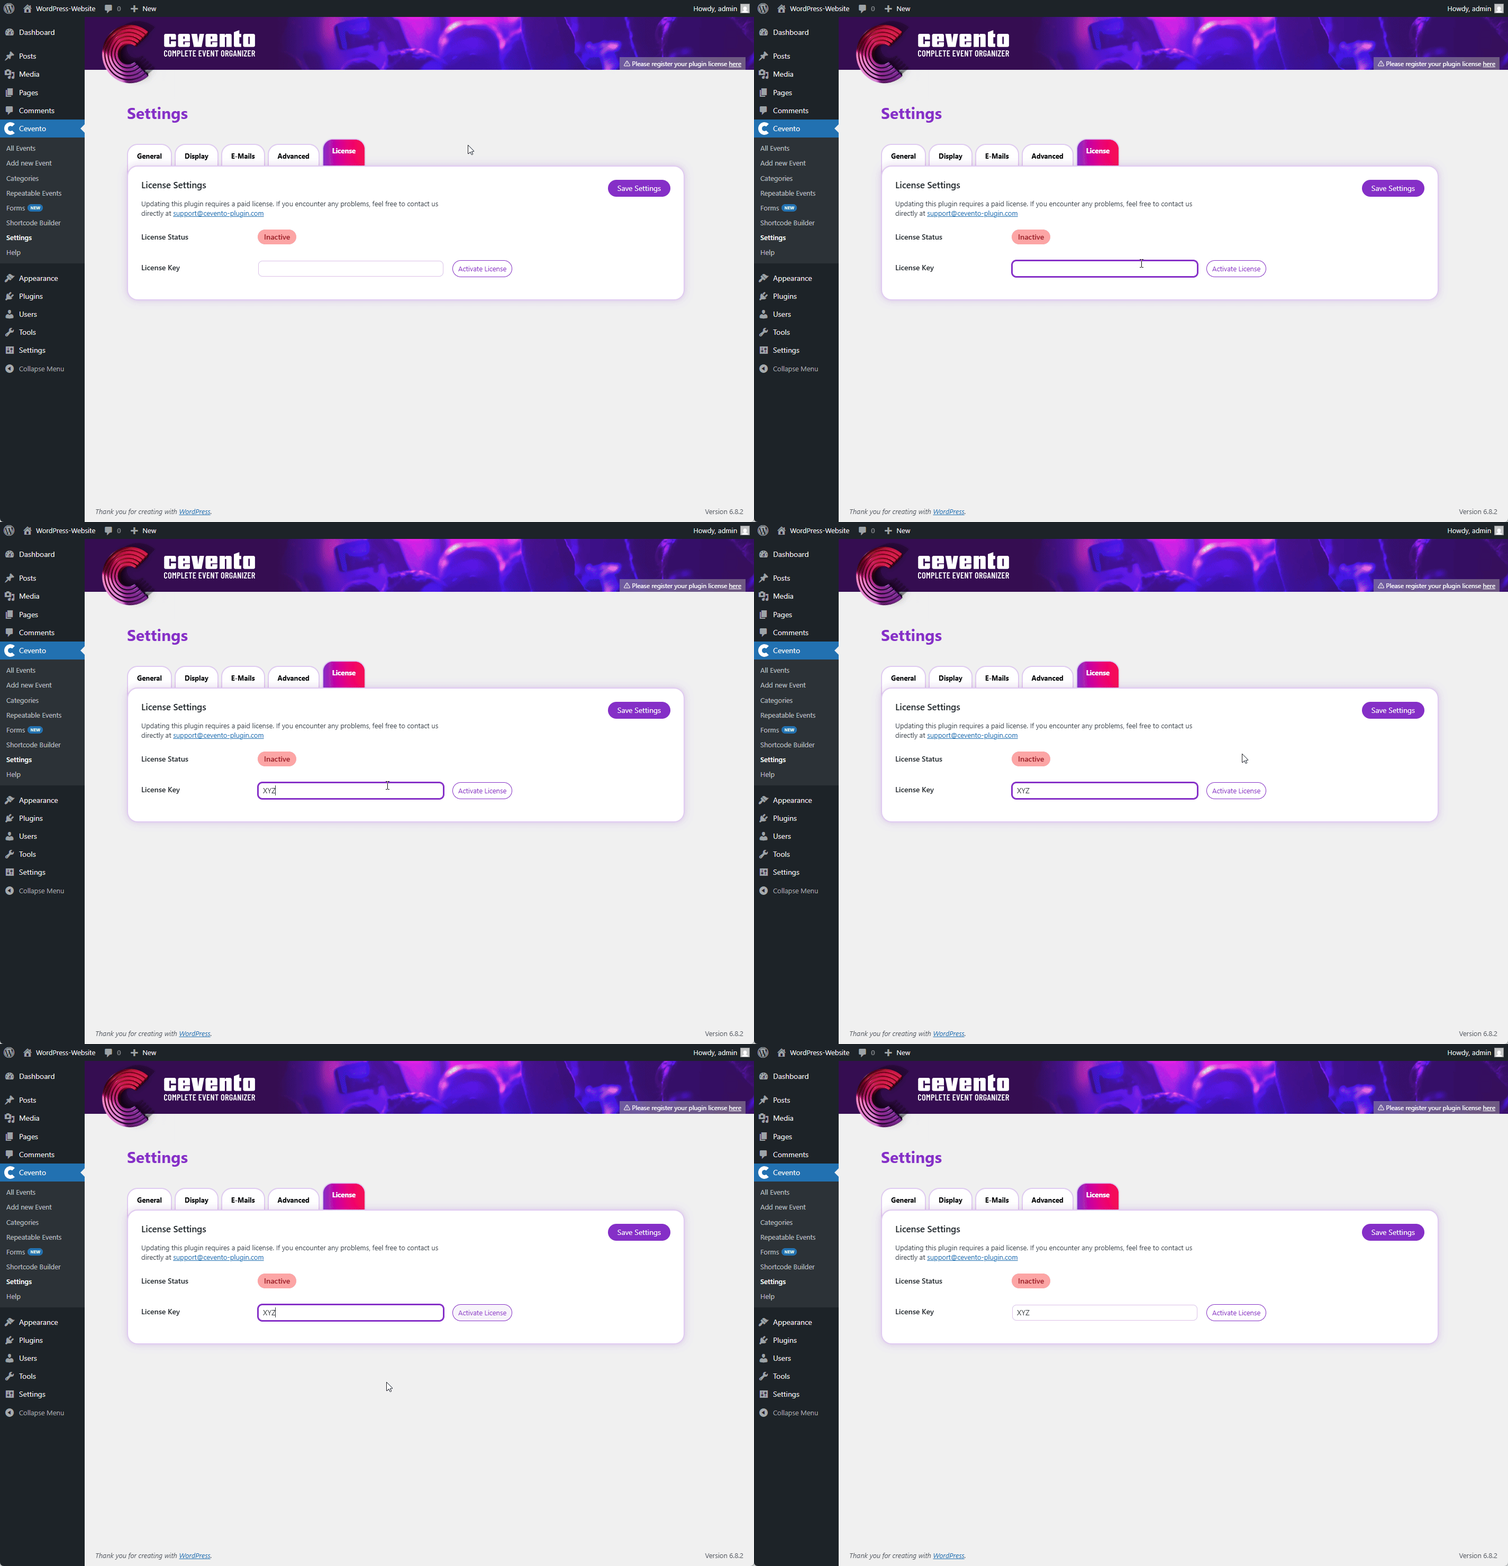
License Settings
To receive all future Cevento updates in WordPress, you must enter your Cevento license key, which you received when purchasing the plugin, in this tab.
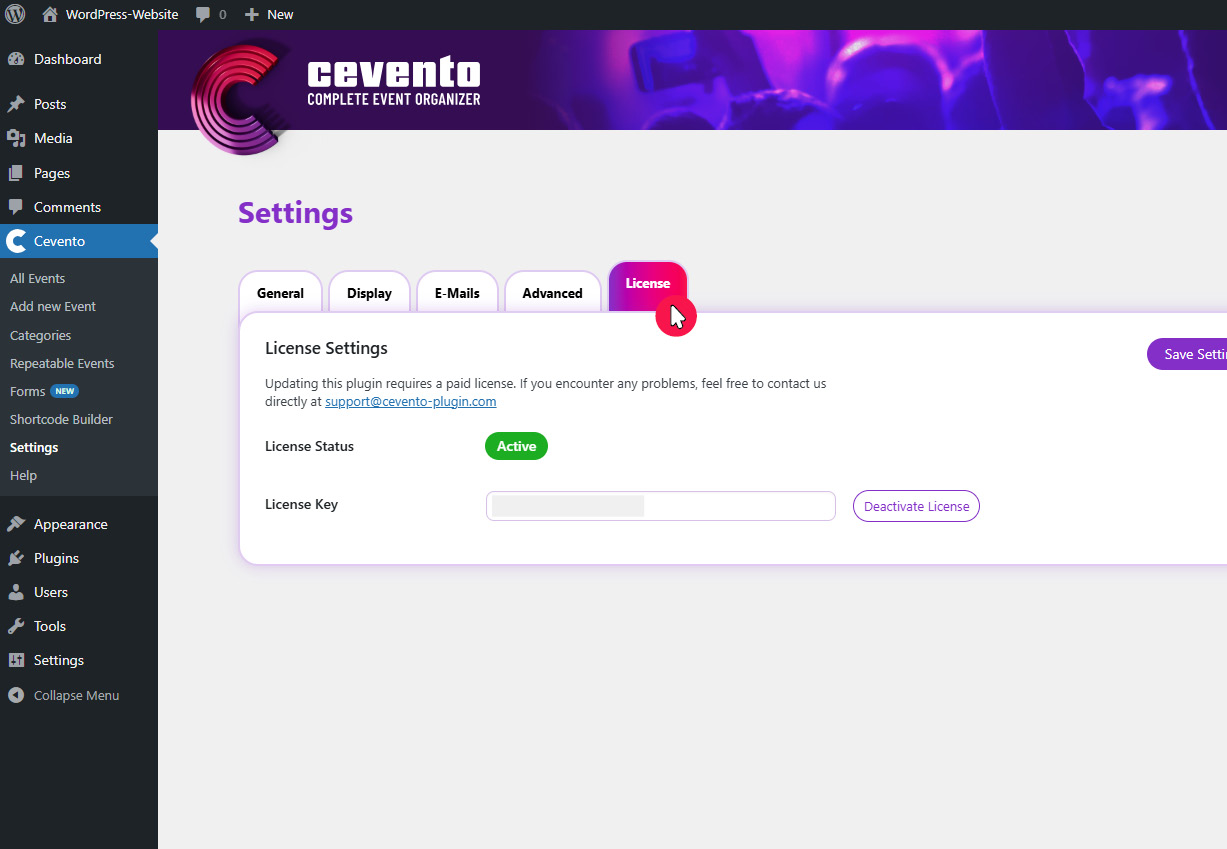
License Status
The License Status shows whether your license is active. Only with an active license can updates for Cevento be installed.
License Key
Enter your valid License Key in the input field and then click the button Save Settings in the top right corner. The License Status will then show you whether your license is active.