WooCommerce
In this post, we’ll walk you through:
Would you like to offer participation in your events for purchase? Cevento makes it possible. Thanks to the integration with WooCommerce, you can sell events directly via your website. You enjoy all the advantages of WooCommerce (online payment, tax calculation and much more) and those of Cevento (individualised booking form and single event view, place allocation and much more).
Preparation
Before you can use payable events in Cevento, you should complete the following steps.
- Learn the basics of working with WooCommerce and Cevento
- Install and set up WooCommerce
- Purchase, install and configure Cevento
Overview
The following summarises how Cevento works with WooCommerce.
Your event gets a WooCommerce product
In Cevento, you can create a WooCommerce product for your event with the product type Cevento Event. This means your event will be offered for sale on your website via WooCommerce. The Cevento Event is hidden from the WooCommerce shop page and does not have a WooCommerce product detail page. Instead, payable events are displayed as usual in the event views and have a single view from Cevento. The event booking ends up in the shopping cart via the booking form and can be paid for.
One advantage of separating the shop page from events is that your shop stays organised if you also want to sell products that are not related to events. Furthermore, if you want to sell events only, you can hide the shop page.
Sales process
Users see an event on your website and click on it because they want to attend. There, they fill out the booking form (which allows you to request information, e.g. what interests the participants have). Part of the booking form is the number of spots to be purchased. Once completed, the booking is added to the shopping basket as a product. The selected number of spots is now reserved for 10 minutes and cannot be booked by other users. If customers do not start the payment process in WooCommerce Checkout within the reservation period, Cevento checks on visiting the Checkout whether there are still enough spots available. If all spots have been booked in the meantime, the product is removed from the shopping cart and the users are informed. From here on, everything runs as you have configured it in WooCommerce. Additionally, there is a new WooCommerce email that applies to Cevento products (see below).
Managing paid bookings
You can still manage the bookings for your payable event in Cevento. A few useful features have been added. You can find more information under the heading Managing WooCommerce orders for Cevento events.
Order management
In addition, WooCommerce displays all orders for your product of type Cevento Event as usual.
Adjust global Cevento settings
A new tab called WooCommerce has been added to the global settings of Cevento as a result of the integration. You can adjust the following settings there.
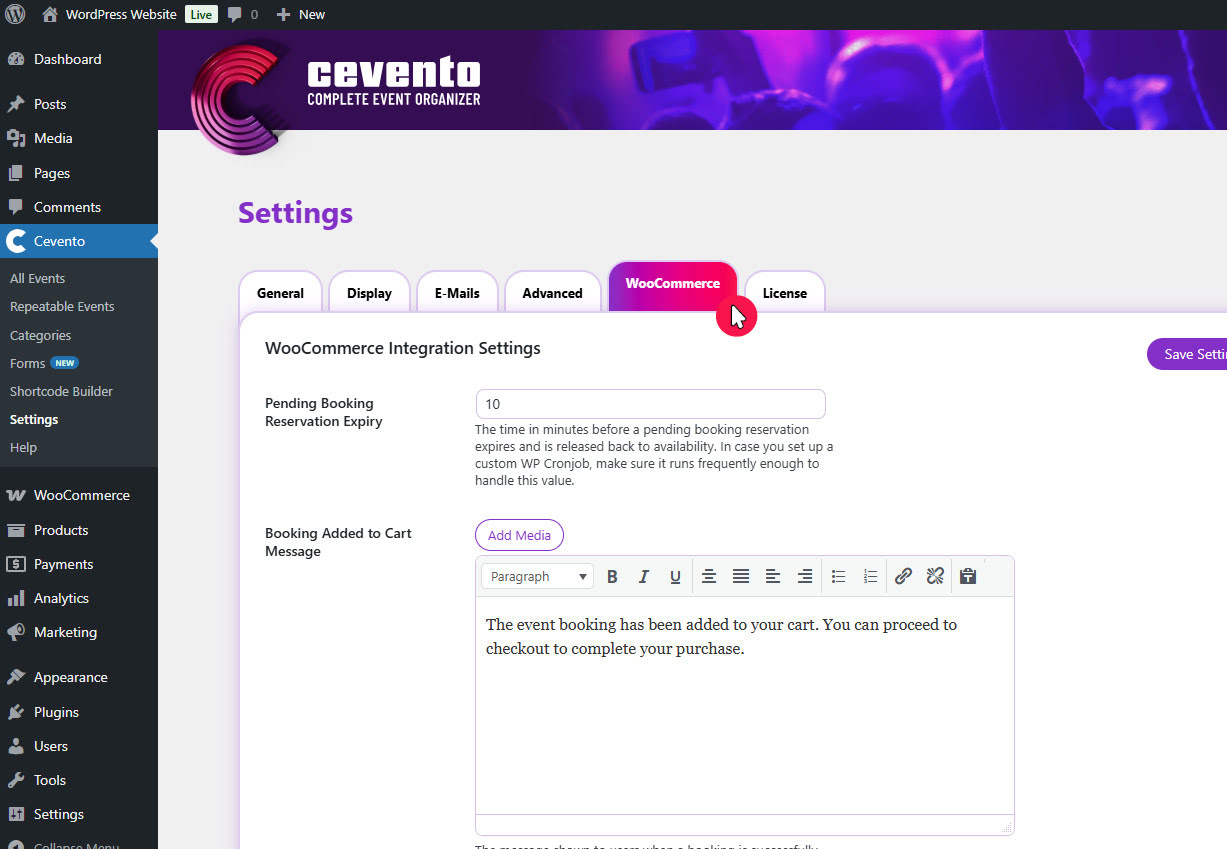
Booking Added to Cart Message
The message entered here will be displayed on your website when users have successfully added their booking to the shopping cart.
It is also a good idea to inform your users about the reservation period for the booked spots. You can find this in a setting in the same tab explained also in the paragraph directly below.
Pending Booking Reservation Expiry
The time in minutes before a pending booking reservation expires and is released back to availability. In case you set up a custom WP Cronjob, make sure it runs frequently enough to handle this value.
Customise WooCommerce settings
Cevento adds a new email template to WooCommerce, which you can customise in the settings.
WooCommerce email: Cevento booking confirmed
The only email that is automatically sent for your payable event (excluding the standard WooCommerce emails) is the email called Cevento booking confirmed. This is sent to your customers as soon as the order with the event booking has been successfully paid for.
You can find the template for this email in the WordPress dashboard under WooCommerce → Settings in the Emails tab, where you can manage it. For example, you can customise the text of the email here.
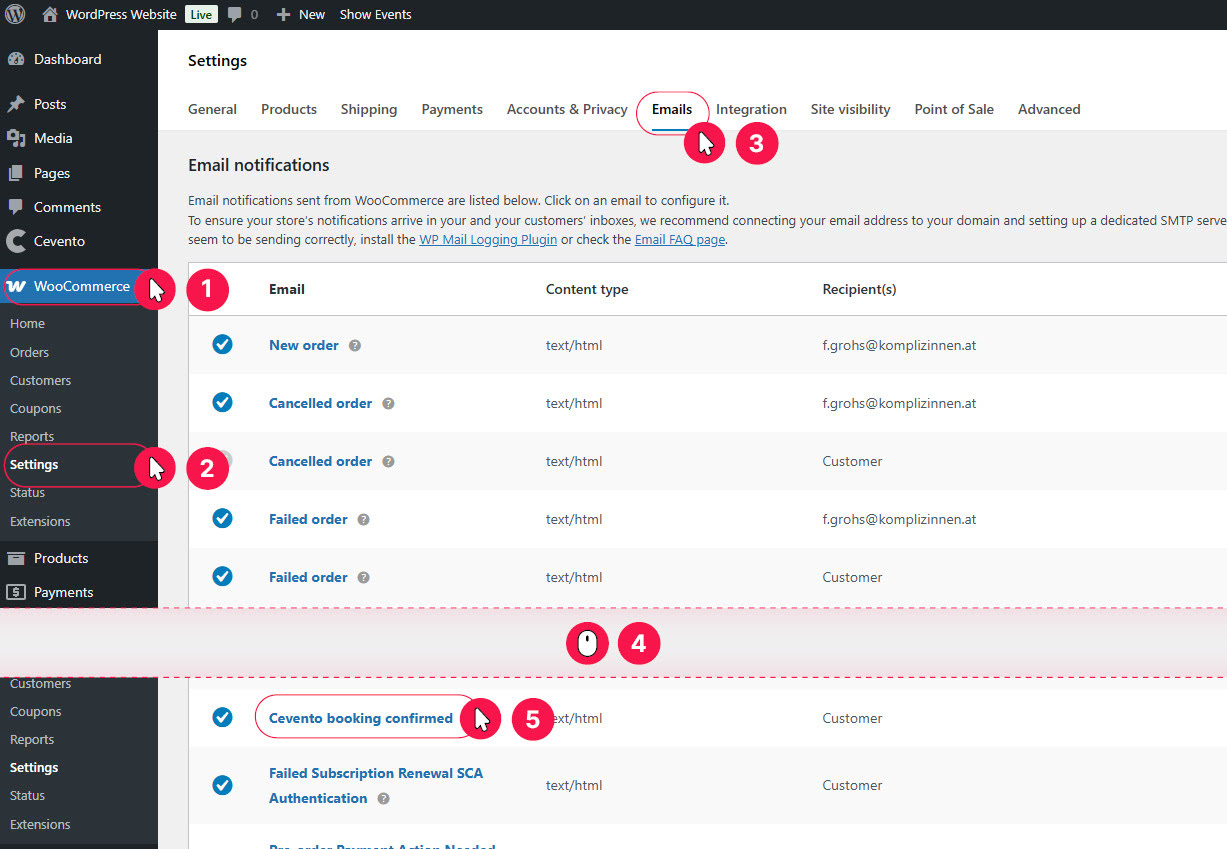
(1-3) Navigate to the WooCommerce email settings; (4) Scroll down a little; (5) Click on the template ‘Cevento booking confirmed’
How to set up your event for purchase
If WooCommerce is installed on your website and you have enabled bookings in the event settings, you will see a new metabox called WooCommerce in the event settings. There, you can generate a WooCommerce product and link it to the event by clicking on the Create product button. Once the product has loaded successfully, you will receive a message and see a new link and button in the meta box. You can delete the product again using the link Unlink and trash product.
Caution! All bookings and orders only exist in relation to the product. If you delete the linked product, you will lose all booking and order data as well.
With the button Edit product, you can configure the settings for the product.
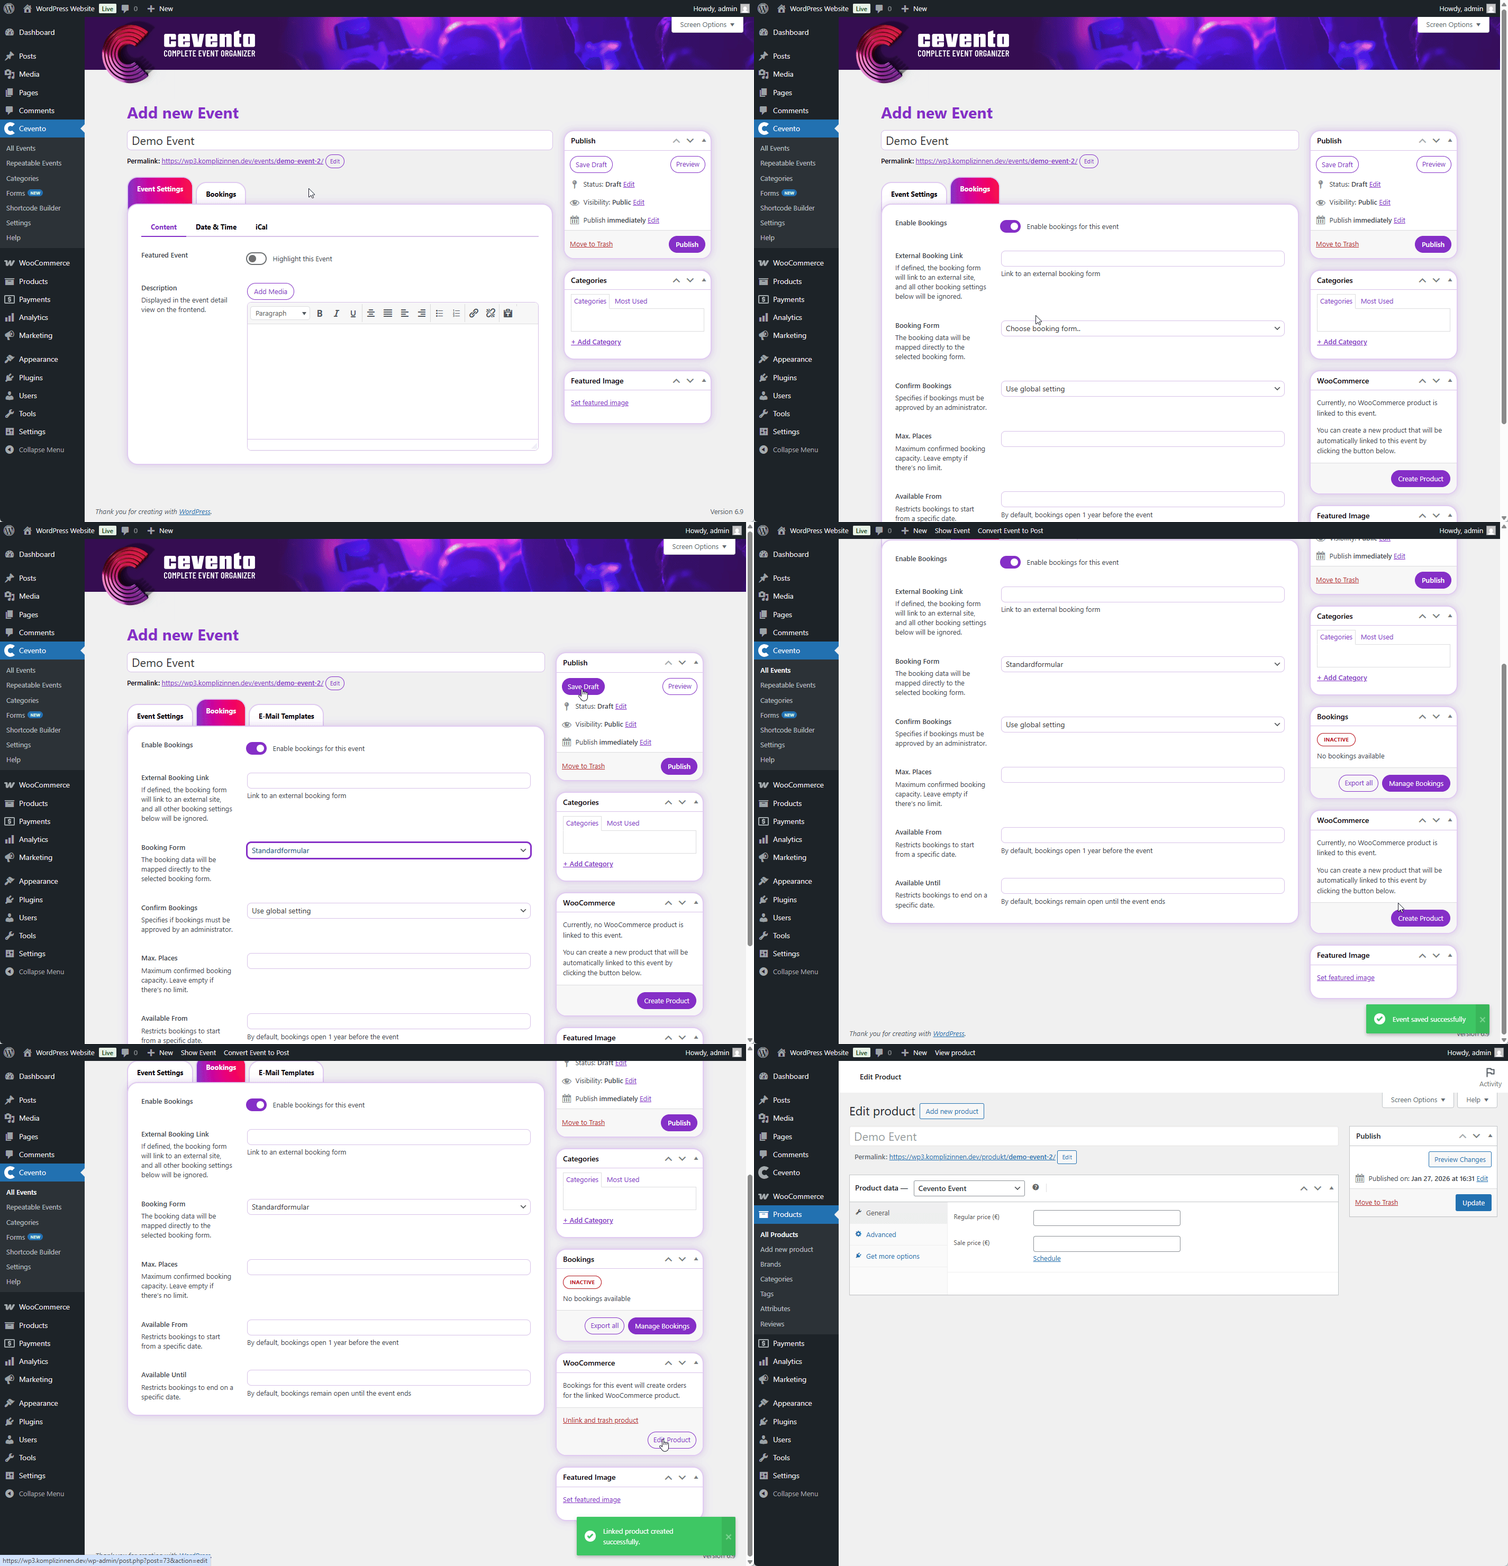
Edit Cevento product
To set the price of your event or edit other product properties, click on the Edit Product button in the metabox called WooCommerce. After clicking, you will be taken to the edit page for the newly created product. Products linked to an event are of the product type Cevento Event.
Caution! If you change the product type in the product settings from Cevento Event to another, the link to your event will be broken. This will cause you to lose all booking and order data.
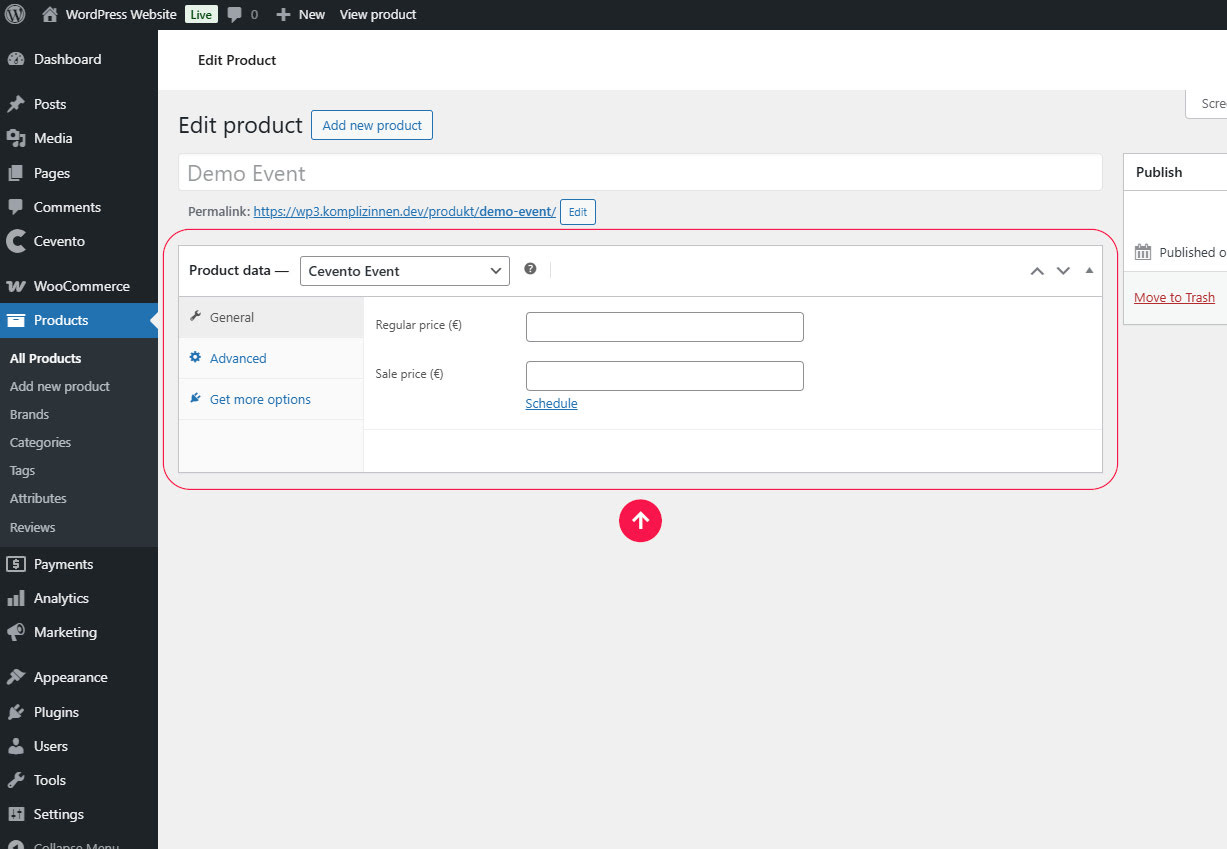
Here you can edit the product in the usual way in WooCommerce. Add the price and select the tax rate, for example. All WooCommerce settings that you do not see in the product settings of Cevento Event are hidden by Cevento and managed automatically. You can find a description of the product settings in the WooCommerce documentation. Don’t forget to click Update if you want to save the settings.
Customise your booking form
We recommend adding an email field to your booking form, which you can set as the recipient address for booking emails. To do this, open the form builder and activate the switch This is the recipient for all user emails for the email field.
Although this is not essential for Cevento to function, it allows you to clearly identify booking entries and send Cevento emails at a later point in time.
Manage WooCommerce orders for Cevento events
You can manage orders for your payable events as usual in WooCommerce. For more information, see the WooCommerce documentation.
New features in the Cevento dashboard
Once WooCommerce is activated on your website, you will discover the following new features in connection with Cevento.
Icon for payable events
Payable events are marked with a banknote icon in the Cevento dashboard.
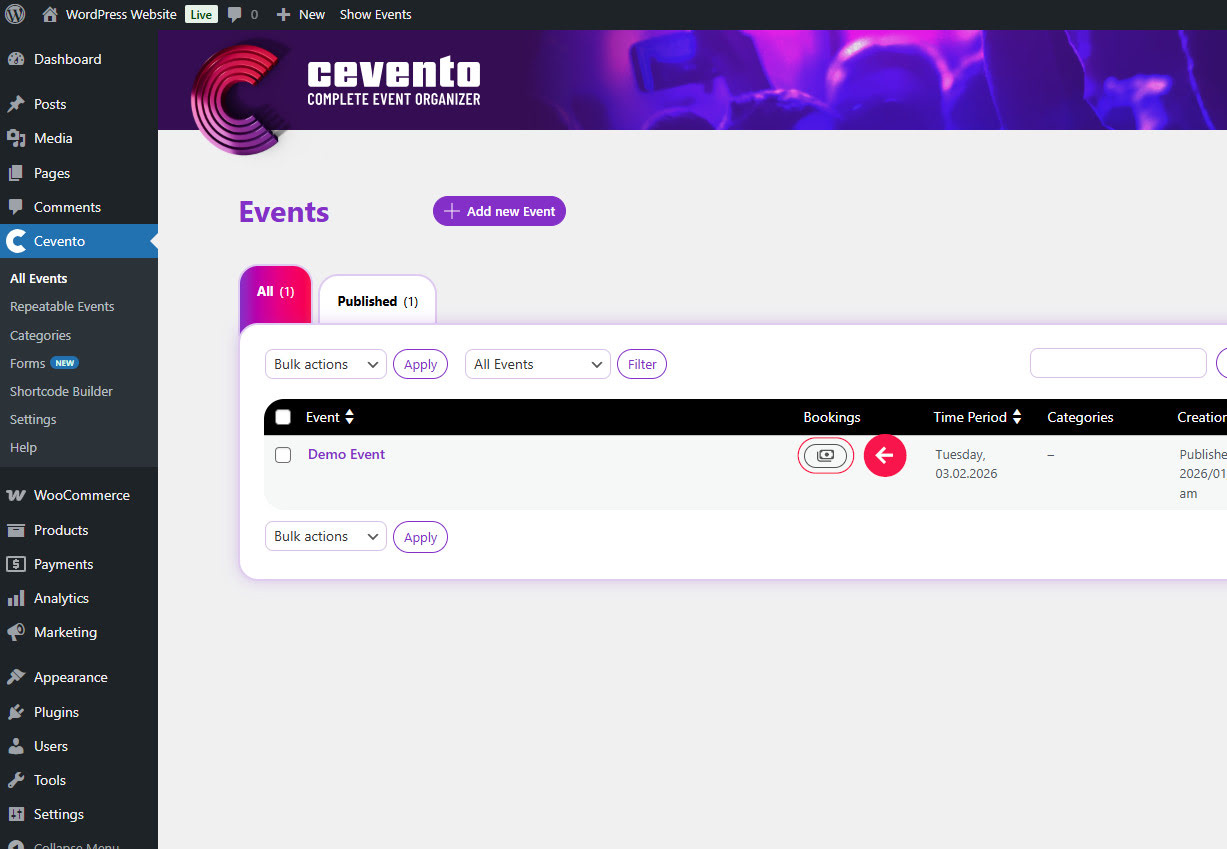
Changes to event settings
Once you have linked your event to a product, there will be a few changes to the settings for your payable event. To view these, go to your WordPress dashboard, click on Cevento → All Events and then click on your payable event.
Confirm Bookings
The setting Confirm Bookings disappears. The status of bookings now depends solely on the payment status of the respective order.
New features in booking management
The integration with WooCommerce adds several new functions and booking statuses to booking management.
Additional functions
Exporting paid Bookings
In the booking overview of your payable event, you will find a new button called Export paid Bookings in the Export tool metabox. By clicking on this button, you can download a CSV file containing only the booking data for paid bookings.
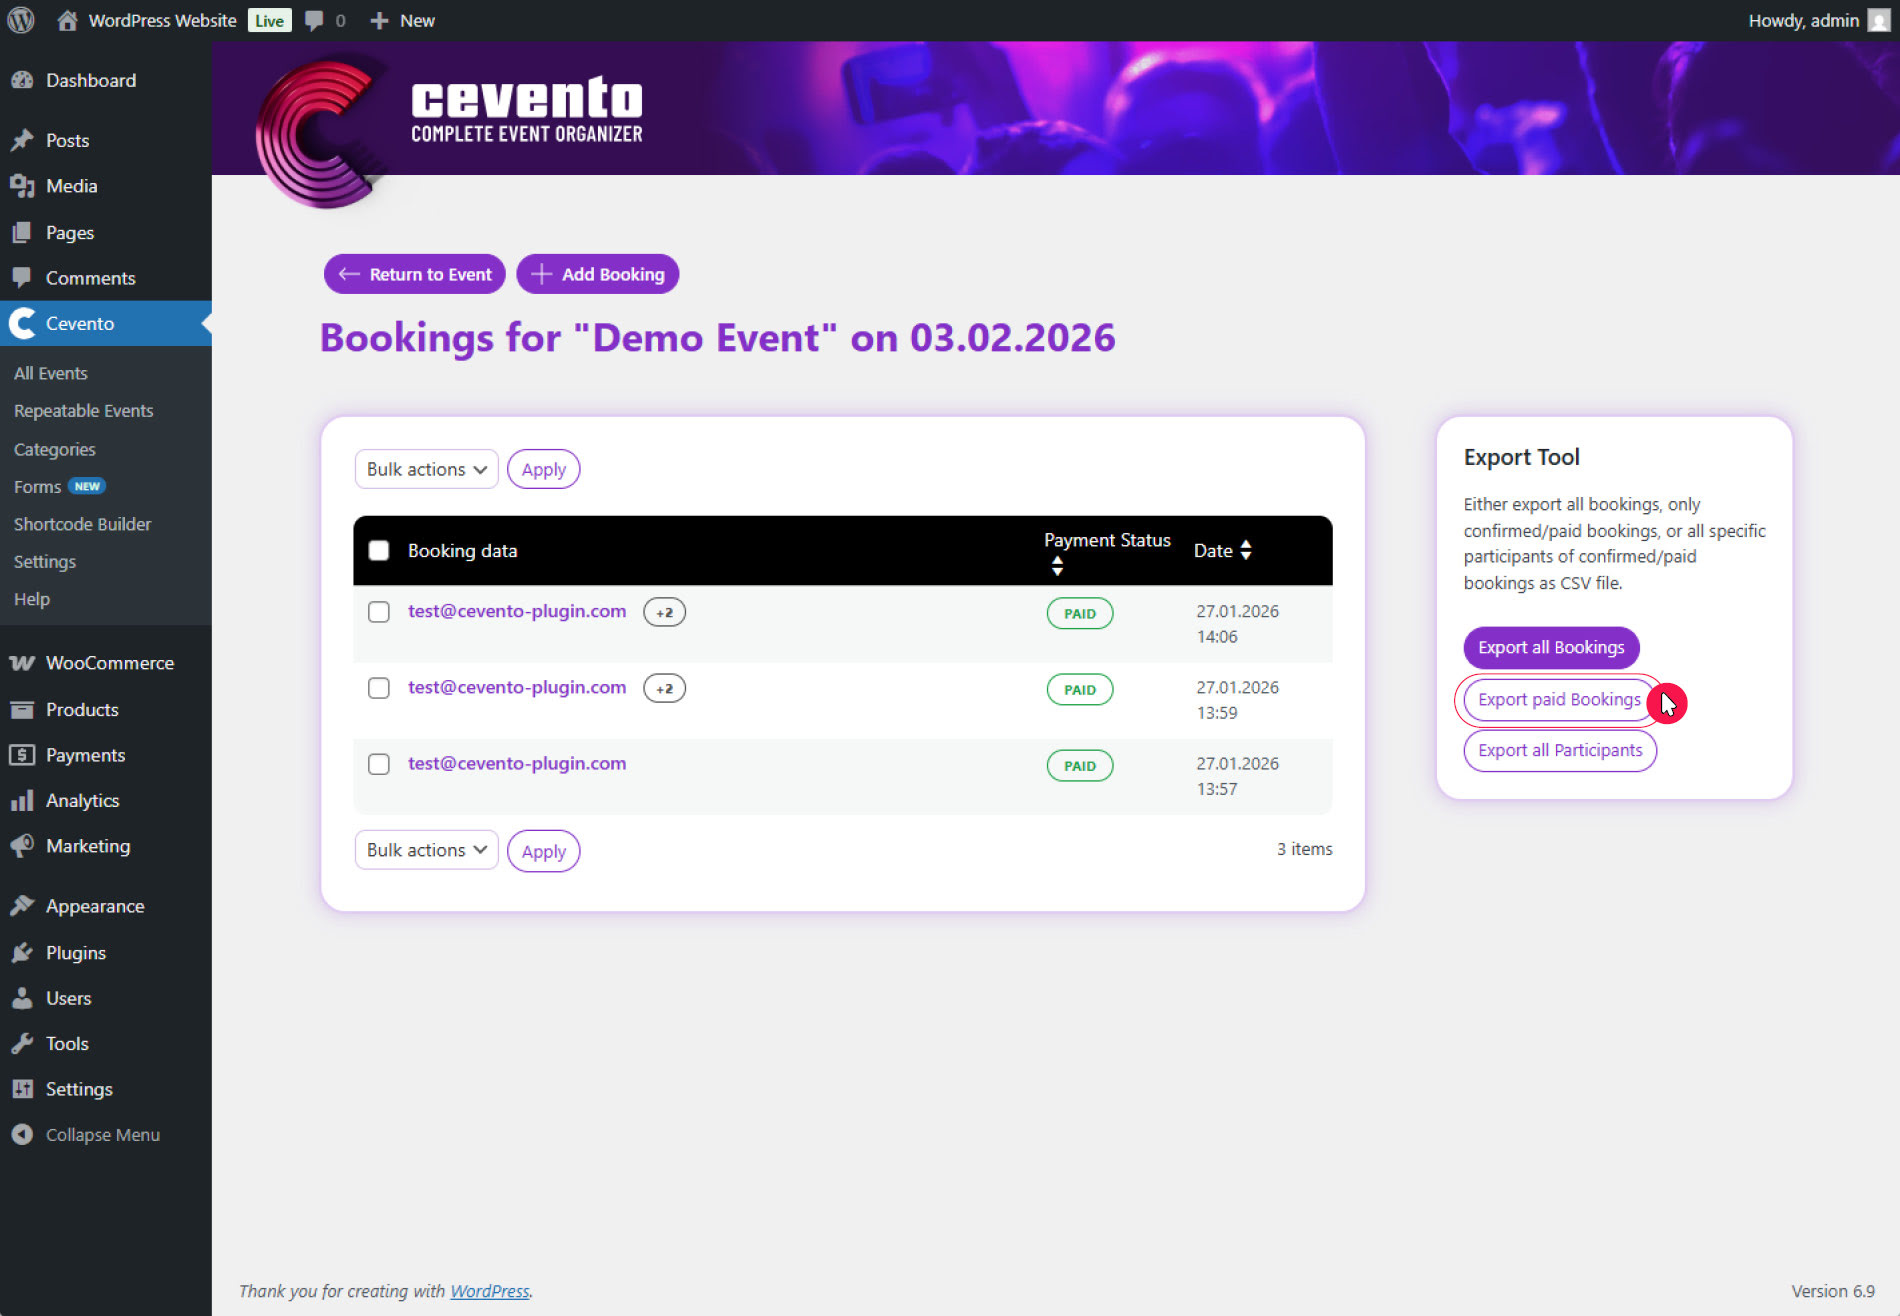
If you just wish to receive a list of all participant data, use the Export all Participants button.
Additional booking statuses
Three additional statuses are added to Cevento’s booking statuses because of the payment process:
- Paid (green): The order with the booking has been successfully paid for. One place for the event has been allocated per participant.
- Abandoned (grey): This booking has been in the user’s shopping cart for longer than the reservation period. The booking does not occupy any spots.
- via Admin (green): This booking was created by admins and not submitted via the booking form on the website. The booking is considered paid and occupies one place per participant in your event.